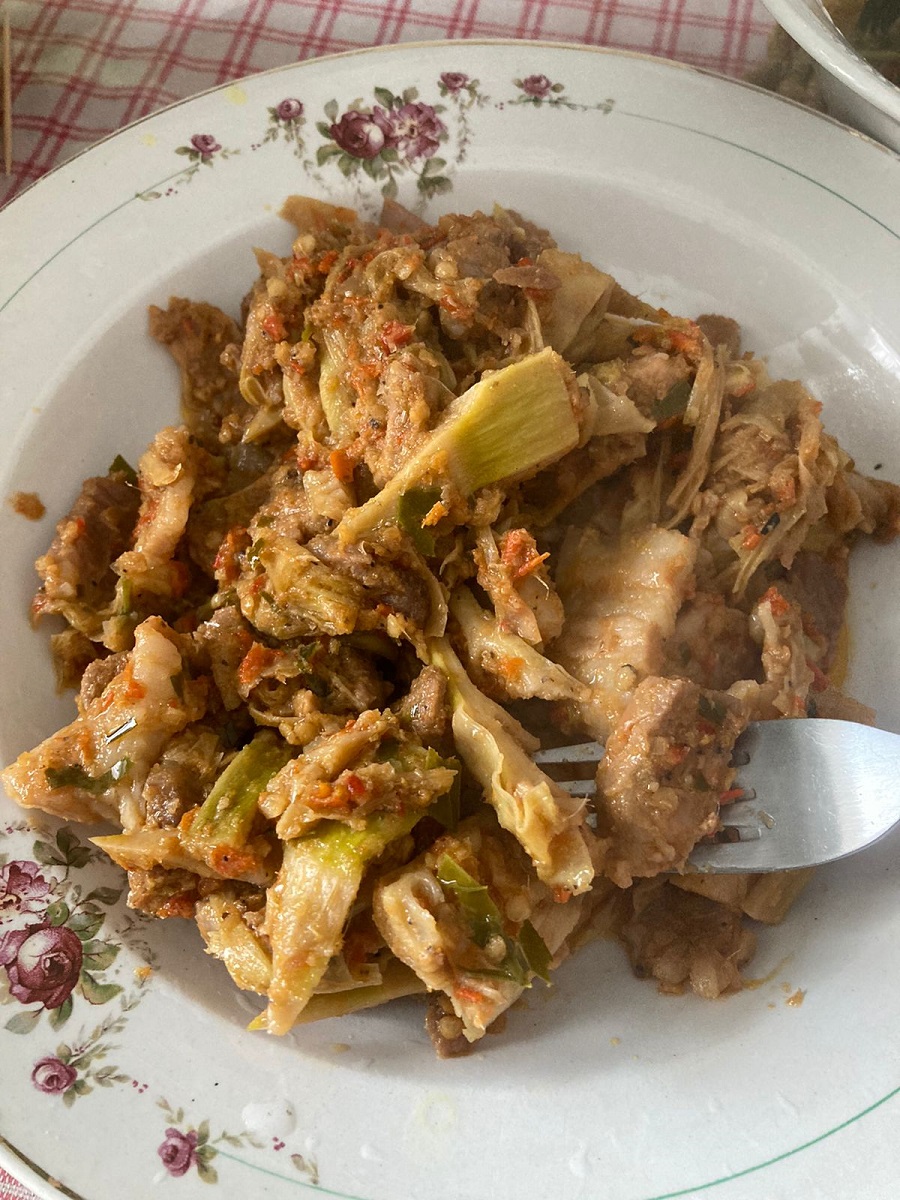
Thai Cuisine: Stir-fried Chicken, the Recipe

gallina saltata in padella con citronella e peperoncini e foglia di limone

Thai Cuisine: Stir-fried Chicken with Lemongrass and Chilli and Lemon Leaf, the recipe.

This is a dish my friend Sao and I ate together, she cooked it Thai style and therefore made it quite spicy and salty. I hope you like this dish too and can follow the instructions to make it at home. The meal consisted of chicken curry (which I wrote you the ricetta), stir-fried chicken, Mắm chưng (Vietnamese meatloaf which I will tell you about another time) and rice.

Click vào đây để đọc bằng tiếng việt!
If you are curious about this recipe of mine or Vietnamese food in general, write me a message. comment or go to the bottom of the site to read what other visitors have written.

Ingredients

– 1/2 chicken (we bought chicken because Asians like to eat rather tough meat but you can use a more common chicken if you want);
– 5 stalks of lemongrass, finely chopped;
– 7 chili peppers, finely chopped;
– Onions, garlic: finely chopped;
– Lemon leaves;
– Olive oil;
– Fish sauce, monosodium glutamate, seasoning powder, sugar and pepper.

Preparation

The hen is very tough, so after washing it, boil it for 30-45 minutes until the meat is softer, then cut it into bite-sized pieces and marinate some seasonings: 1 tablespoon of fish sauce, a little pepper, a little chopped lemongrass, chopped onion and garlic. Marinate for 20 minutes.

Next, put 3 tablespoons of olive oil in the pan, heat the oil and fry some onion and garlic.

Then add the lemongrass and chili to stir fry until fragrant. Then add the chicken and stir fry until the meat is firm and browned, then add the seasoning: 2 tablespoons of fish sauce, 1/3 teaspoon of seasoning, 1/2 teaspoon of MSG, 1/2 teaspoon of sugar and add a little water.
Continue to cook on low heat until the chicken is the consistency you like.

When the chicken pieces are ready, remove them from the pan and drain them and sauté them in a pan for 1-2 minutes, adding the lemon leaves and a little pepper to make it fragrant.

At this point the chicken, sautéed with lemongrass and chilli pepper is ready to be served and, above all, enjoyed!

Nguyên liệu
* 1 con gà Galina chia ra: 1/2 làm cà ri gà, 1/2 làm gà xào sả ớt lá chanh (có thể dùng loại gà khác, vì người Châu Á thích ăn gà dai nên chúng tôi mua gà Galina)
* 5 nhánh sả, thái nhỏ
* 7 quả ớt, thái nhỏ
* Hành, tỏi: thái nhỏ
* Lá chanh
* Nước mắm, bột ngọt, bột nêm, đường, hạt tiêu.
Cách làm
Gà galina rất dai nên sau khi rửa sạch thì mang đi luộc trong 30-45 phút cho thịt mềm ra, sau đó chặt thành miếng vừa ăn và ướp một ít gia vị: 1 muỗng canh nước mắm, một ít hạt tiêu, một ít sả băm sẵn, hành và tỏi băm sẵn (đã chuẩn bị phía trên). Ướp trong 20 phút.
Tiếp theo, cho 3 muỗng canh dầu ăn vào chảo, làm nóng dầu thì phi thơm hành, tỏi,
sau đó cho tiếp sả và ớt vào xào chung cho thơm. Tiếp đó cho thịt gà vào xào cùng cho đến khi thấy thịt săn lại thì cho gia vị: 2 muỗng canh nước mắm, 1/3 muỗng cà phê hạt nêm, 1/2 muỗng cà phê bột ngọt, 1/2 muỗng cà phê đường và thêm chút nước. Đảo đều thịt gà cho đến khi chín thì nêm nếm lại cho vừa khẩu vị. (Gia vị phí trên là nấu cho ít hơn 1/2 phần con gà galina)
Tiếp tục đun trên lửa nhỏ liu riu cho đến khi thịt gà chín thơm lừng và cạn bớt nước thì tiếp tục cho lá chanh vào, xào thêm 1-2 phút là có thể tắt bếp, cho thêm ít hạt tiêu vào cho thơm.
Trút gà xào sả ớt ra đĩa và thưởng thức.
Bữa cơm này tôi và cô Sau ăn cùng, cô nấu theo phong cách Thái lan nên cô làm khá là cay và mặn mà. Tôi hi vọng bạn cũng thích món này và có thể làm theo như hướng dẫn trên.

Thai recipe: chicken stir-fried with lemongrass and chillies and lemon leaf – Recette thaïlandaise : poulet sauté à la citronnelle et piments et feuille de citronnier – Receta tailandesa: pollo salteado con hierba de limón y guindillas y hoja de limón – Receita tailandesa: frango frito com capim-limão e pimenta e folha de limão – Thailändisches Rezept: Gebratenes Hähnchen mit Zitronengras und Chilis und Zitronenblatt – Công thức món Thái: gà xào sả ớt và lá chanh – 泰式食谱:香茅、辣椒和柠檬叶炒鸡肉 – タイのレシピ: レモングラスと唐辛子とレモンの葉で炒めたチキン

Thai Cuisine: Papaya Salad Som Tum, The Recipe

Ricetta Thailandese: insalata di papaia som tum

Thai Cuisine: Papaya Salad Som Tum, The Recipe

Last week I wrote you a recipe for a Thai soup, which I enjoyed at my friend Sao's house, and as a side dish there was this typical salad famous all over the world: som tum (or som tam) of which I will now explain the recipe.
To tell the truth we didn't have papaya but I assure you that it is just as good if you replace it with cucumber.

Click vào đây để đọc bằng tiếng việt!
If you are curious about this recipe of mine or Vietnamese food in general, write me a message. comment or go to the bottom of the site to read what other visitors have written.

Ingredients

– 2 cucumbers, grated (we didn’t have papaya);
– 1 carrot, grated;
– 2 fresh chili peppers;
– 1 tomato, sliced;
– 3 red bell peppers;
– 2 cloves garlic, peeled;
– 10 g dried shrimp;
– 20 g toasted peanuts;
– lime juice (about 2/3 of a lime);
– Spices: sugar, fish sauce, MSG.

Preparation

First you need to put the garlic, chilli pepper, dried shrimp, peanuts in the mortar and crush everything vigorously.
Where I live with my husband, in Liguria, in almost all the houses there is the typical marble mortar to prepare Genoese pesto. Since in my house we use the blender to make pesto, the mortar was just an ornament so I started using it to prepare my recipes almost always based on crushed spices.
When everything is uniformly crushed, add the chopped carrots and cucumbers to the mortar and mix with a spoon (we will use the mortar to mix the ingredients well).
Then add 1.5 tablespoons of sugar, 3 tablespoons of fish sauce, 1 teaspoon of monosodium glutamate and lemon juice to the mixture; mix well and lightly crush all the ingredients and spices with the pestle. If you want you can adjust the salt to taste.
Last step add the chopped tomatoes to the mixture and continue mixing well once again.

So you finished the som tum! As I wrote I ate this dish at Miss Sau's house from Thailand. Served with rice and other Thai dishes, very tasty.

Gỏi Đu Đủ Thái Lan (somtam/somtum)
* 2 trái dưa leo, bào sợi (do không có đu đủ)
* Cà rốt 1 củ, bào sợi
* 1 trái cà chua, cắt thành nhiều lát
* 3 trái ớt đỏ
* 2 tép tỏi, bóc vỏ
* 10g tôm khô
* 20g đậu phộng rang
* nước cốt chanh (khoảng 2/3 trái chanh lime)
* Gia vị: đường, nước mắm, bột ngọt.
Cách Làm
Bước 1: Cho tỏi, ớt đỏ, tôm khô, đậu phộng vào cối, giã nhỏ.
Bước 2: Trộn chung cà rốt và dưa leo đã bào sợi vào hỗn hợp tôm khô đã giã nhỏ ở bước 1.
Bước 3: Tiếp theo, bạn cho 1,5 muỗng canh đường, 3 muỗng canh nước mắm, 1 muỗng cà phê bột ngọt, nước cốt chanh vào hỗn hợp rồi trộn đều và dùng chày giã nhẹ để tất cả các nguyên liệu và gia vị thấm vào nhau. Nêm nếm lại lần nữa để cho vừa ăn.
Bước 4: Cho cà chua đã cắt vào hỗn hợp. Tiếp tục trộn đều thêm một lần nữa. Thế là bạn đã hoàn thành món som tum rồi đấy! Hôm nay mình ăn món này tại nhà cô Sau- người Thái Lan. Ăn cùng với cơm và các món khác của Thái, rất là ngon.

Thai recipe: som tum papaya salad – Recette thaïlandaise : salade de papaye som tum – Receta tailandesa: ensalada de papaya som tum – Receita tailandesa: salada de papaia som tum – Thailändisches Rezept: Som Tum Papayasalat – Công thức món Thái: gỏi đu đủ som tum – 泰国食谱:som tum 木瓜沙拉 – タイのレシピ: ソムタム パパイヤ サラダ

Spanish croquettes with ham, the recipe

Le crocchette spagnole con besciamella e prosciutto, la ricetta

Spanish croquettes with béchamel and ham, the recipe.
Some time ago I tried to make a Spanish dish at home, the famous croquetas, which I like a lot.
The result was not aesthetically excellent, I admit, but it was decent in taste.

Ingredients

– a piece of raw ham, cut into cubes (you should use Spanish jamon but you have to make a virtue of necessity and make do);
– 80 grams of flour;
– 80 grams of butter;
– half a litre of whole milk;
– salt;
– eggs;
– breadcrumbs.

Preparation

Put the flour and butter in a non-stick pan and mix over low heat, stirring continuously with a whisk.
When the butter has melted and mixed with the flour, add the milk and continue stirring.
Don't be afraid if the mixture seems too liquid because in a few minutes the magic will happen and the mixture will begin to thicken.
Now add the diced ham and a pinch of salt and, once the mixture is well distributed, remove it from the heat and let it cool on a plate or in a container.
Now begins the part that I found most difficult: forming the balls (or knell) and breading them in the egg and breadcrumbs... I read several methods and the one I followed did not lead to excellent aesthetic results; but I'll explain how I did it and how perhaps it should have been done.
Once the mixture reached room temperature I put it in the fridge for a couple of hours to make it as solid as possible and then I created some balls (to tell the truth I used two spoons to create like dumplings) that I coated in beaten egg and breadcrumbs that I fried in plenty of seed oil.
Maybe I should have left the mixture longer, more than a couple of hours in the fridge. The balls remained not quite one with the breading and a lot of the content ended up dispersed in the pan where I fried them. I read that some people make the balls and freeze them and then coat them in breadcrumbs while frozen. Next time I'll try.

The result however, as I told you, was not the best aesthetically but the taste was right. Add your own comment or go to the bottom of the site to read what other visitors have written.

Le crocchette spagnole con besciamella e prosciutto, la ricetta

Le crocchette spagnole con besciamella e prosciutto, la ricetta

Le crocchette spagnole con besciamella e prosciutto, la ricetta

Photo taken with Canon EOS M100 and lens Canon EF-M 22.

Spanish croquettes with bechamel and ham, the recipe – Croquettes espagnoles à la béchamel et au jambon, la recette – Croquetas españolas con bechamel y jamón, la receta – Croquetes espanhóis com bechamel e presunto, a receita – Spanische Kroketten mit Béchamel und Schinken, das Rezept – Bánh croquettes Tây Ban Nha với bechamel và giăm bông, công thức – 西班牙炸丸子配调味酱和火腿,食谱 – ベシャメルとハムのスペイン風コロッケ、レシピ

Thai Cuisine: Short Rib Soup, The Recipe

Ricetta Thailandese: zuppa di costolette di maialino

Thai cuisine: pork rib soup, the recipe.
A few days ago I also went to eat at my Thai friend Sao's house and, together with her, we prepared an excellent Thai dish. As a side dish there was also a nice salad typical of her country, the som tam, (but I will write a separate article about it when I find the inspiration) some fried anchovies (maybe these more typical of our Riviera) and rice.
We had a delicious lunch on a cold winter day.

Click vào đây để đọc bằng tiếng việt!
If you are curious about this recipe of mine or Vietnamese food in general, write me a message. comment or go to the bottom of the site to read what other visitors have written.

Ingredients

– 250 grams of pork ribs (preferably from a young specimen);
– 2 cloves of garlic;
– 1 red onion;
– 6 fresh chillies;
– 2 lemongrass plants cut into pieces;
– 3 lemon leaves;
– Olive oil
– Spices: salt, monosodium glutamate, sugar, prawn paste (pictured), fish sauce, pepper.

As always, some ingredients are a little difficult to find. I sometimes go to Genoa where there are more shops where I can find many interesting things that in my town they just don't know.

Preparation

First, let's start cooking the rice in the appropriate kettle.

Then we prepare the spices: put the garlic, red onion, fresh chili pepper and lemongrass in a blender and chop finely. Then put the mixture in a saucepan and fry with olive oil until fragrant, add about 1.5 liters of water.
Add the cleaned ribs and other seasonings: 1 teaspoon salt, 1 teaspoon MSG, 1/2 teaspoon sugar, 1 tablespoon shrimp paste, add lemon leaves.
Cook until the mixture comes to a boil, reduce the heat and cook for another 15 minutes until the meat is tender, then add 2 tablespoons fish sauce and pepper to taste.

The preparation of young pork ribs (spicy) is very similar to Thai chicken curry (which I told you about here) but differs in some spices. Most Thai dishes are cooked spicy and fragrant with shrimp paste (pictured) and the aroma of lemon leaves and lemongrass.
If you eat it a couple of times you become addicted to Thai food very easily!

Canh sườn non cay

– 250gram sườn heo non
– 2 tép tỏi
– 1 củ hành tím
– 6 quả ớt tươi
– 2 cây sả cắt thành nhiều khúc nhỏ
– Lá chanh: 3 lá
– Gia vị: muối, bột ngọt, đường, mắm tôm, nước mắm, tiêu
– (Một số gia vị phải mua tại Genova)
Cách nấu:
Cho tất cả: tỏi, hành tím, ớt tươi, sả vào máy xay và xay nhỏ. Sau đó cho hỗn hợp vào xoong và xào với dầu ăn cho đến khi vàng thơm, cho lượng nước khoảng 1,5 lít, nấu xôi sau đó cho sườn non đã làm sạch vào và nêm gia vị: 1 muỗng cà phê muối, 1 muỗng cà phê bột ngọt, 1/2 muỗng cà phê đường, 1 muỗng canh mắm tôm, cho lá chanh vào. Nấu đến khi hỗn hợp sôi lên, hạ nhỏ lửa và nấu trong 15 phút hơn cho thịt mềm, sau đó cho thêm 2 muỗng canh nước mắm và nêm nếm lại gia vị vừa khẩu vị gia đình, thêm tiêu và hoàn tất món ăn.
Món sườn non nấu cay, cũng tương tự như món cà ri gà của Thái lan, nhưng có một số gia vị không cho vào. Hầu hết các món ăn của Thái được nấu cay và thơm mùi mắm tôm, và mùi thơm của các loại lá và sả, ăn một vài lần là nghiện món ăn của người Thái.

Hôm nay, cô Sau nấu món này, cùng với món cá cơm chiên bột, món rau trộn salad Thái (somtam) và cơm. Chúng tôi đã có một buổi trưa thật ngon miệng trong ngày đông lạnh giá.

Thai recipe: pork rib soup – Recette thaïlandaise : soupe de côtes de porc – Receta tailandesa: sopa de costillas de cerdo – Receita tailandesa: sopa de costela de porco – Thailändisches Rezept: Schweinerippchensuppe – Công thức món Thái: súp sườn heo – 泰式食谱:排骨汤 – タイのレシピ: ポークリブ スープ

Thai Cuisine: Spicy Thai Chicken Curry, The Recipe

Ricetta Thailandese: pollo thai al curry piccante

Thai Cuisine: Spicy Thai Chicken Curry, The Recipe

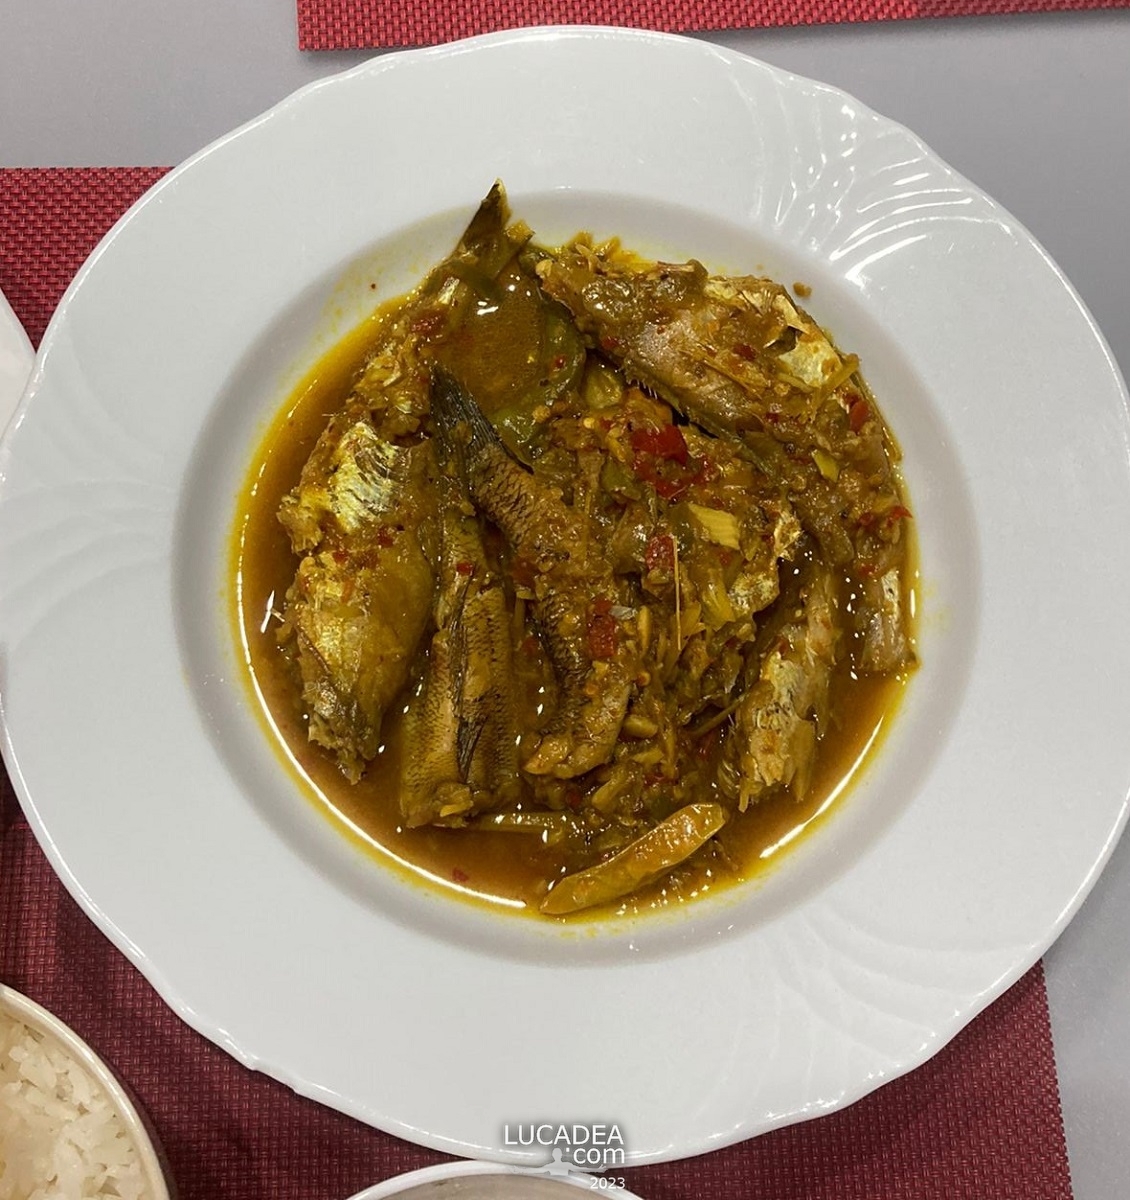
Today I was invited to eat at my Thai friend's house, Sao, who prepared a really good and exceptionally spicy dish for me: chicken with spicy Thai curry. And as you can see in the photos there was also a plate of fried anchovies, as a side dish.

Click vào đây để đọc bằng tiếng việt!
If you are curious about this recipe of mine or Vietnamese food in general, write me a message. comment or go to the bottom of the site to read what other visitors have written.

Ingredients

– 1 whole chicken (preferably a hen), cleaned and cut into pieces;
– 5 cloves of garlic;
– 2 shallots;
– 1/4 onion;
– 6 fresh chili peppers;
– 2 lemongrass plants, cut into small pieces;
– 5 lemon leaves;
– Galangal: half a small tuber, cut into slices (if you don't know what it is, go here)
– Spices: salt, monosodium glutamate, sugar, shrimp paste, fish sauce, pepper (I can only find some spices in Genoa).
– Obviously some white rice (preferably the sticky kind).

Preparation

First, cook the rice in the classic Asian rice cooker.
Then we prepare the chicken: take all the vegetables (garlic, red onion, shallots, fresh chili pepper, lemongrass) and put them in a blender and grind it with water.
Then put the mixture in a saucepan and add about 2 liters of water then add the chicken and the seasoning: 1 tablespoon of salt, 1 teaspoon of MSG, 1 teaspoon of sugar, 1.5 tablespoons of shrimp paste, add the galangal and lemon leaves. Cook until the mixture comes to a boil, lower the heat and cook for another 30 minutes until the meat is tender, then add 2 tablespoons of fish sauce and season to taste, add pepper and finish the dish.

Although curry powder is not added in Thailand, spicy chicken cooked with lots of spices is called Thai-style “chicken curry.”

The chicken after cooking is still hard (because we used chicken meat) but if you want the meat to be tender you can cook it longer. It is extremely spicy, salty and scented with lemon leaves, lemongrass and galangal, this dish is eaten on extremely cold days because it warms and cheers.

Ricetta Thailandese: pollo thai al curry piccante

Pranzo in Thailandese amica
Thailand spicy chicken curry

– 1 con gà Gallina, làm sạch và cắt miếng. (Mua tại siêu thị Coop)
– 5 tép tỏi
– 2 củ hành tím
– 1/4 củ hành tây
– 6 quả ớt tươi
– 2 cây sả cắt thành nhiều khúc nhỏ
– Lá chanh: 5 lá
– Riềng: nửa củ nhỏ và cắt thành lát.
– Gia vị: muối, bột ngọt, đường, mắm tôm, nước mắm, tiêu
– (Một số gia vị phải mua tại Genova)

Cách nấu:
Cho tất cả: tỏi, hành tím, hành tây, ớt tươi, sả vào máy xay và xay nhỏ cùng với nước. Sau đó cho hỗn hợp vào xoong và cho lượng nước khoảng 2 lít, nấu xôi sau đó cho gà vào và nêm gia vị: 1 muỗng canh muối, 1 muỗng cà phê bột ngọt, 1 muỗng cà phê đường, 1,5 muỗng canh mắm tôm, cho riềng và lá chanh vào. Nấu đến khi hỗn hợp sôi lên, hạ nhỏ lửa và nấu trong 30 phút hơn cho thịt mềm, sau đó cho thêm 2 muỗng canh nước mắm và nêm nếm lại gia vị vừa khẩu vị gia đình, thêm tiêu và hoàn tất món ăn.
Tuy không cho bột cà ri vào nhưng ở Thái lan, thịt gà nấu cay cùng với nhiều gia vị được gọi là nấu “cà ri gà” phong cách Thái. Gà sau khi nấu vẫn dai thịt (vì đây là gà gallina, nếu muốn thịt mềm có thể nấu lâu hơn) và cực kì cay, mặn mà và thơm mùi lá chanh, sả và riềng, món này ăn vào những ngày lạnh cực kì ấm áp và đầy hưởng thụ.

Thai cuisine: spicy Thai chicken curry – Cuisine thaï : curry de poulet thaï épicé – Cocina tailandesa: curry picante de pollo tailandés – Culinária tailandesa: caril de frango tailandês picante – Thai-Küche: würziges thailändisches Hähnchen-Curry – Ẩm thực Thái Lan: cà ri gà Thái chua cay – 泰国烹调:辣泰国咖喱鸡 – タイ料理:スパイシータイチキンカレー

Vietnamese Cuisine: Grilled Meat with Kimchi, the Recipe

Ricetta Vietnamita: carne alla griglia con kimchi

Vietnamese Cuisine: Grilled Meat with Kimchi, the Recipe

Click vào đây để đọc bằng tiếng việt!
If you are curious about this recipe of mine or Vietnamese food in general, write me a message. comment or go to the bottom of the site to read what other visitors have written.

Every now and then I cook this dish because it's quick and very good.
Now I'll explain how I prepare it.

Ingredients

– Lettuce, washed cucumber, sliced ​​cucumber;
– Kimchi (you need to prepare it three days in advance or you can buy it in Asian supermarkets);
– 2 hard-boiled eggs, cut into pieces;
– Bacon: 130 grams;
– Beef tendon: 130 grams;
– Finely chopped onions: 3 teaspoons;
– Finely chopped garlic: 2 teaspoons;
– Chopped chives (lemon): 1 teaspoon;
– Fresh chili pepper: finely chopped;
– Chili satay: 3 teaspoons;
– Korean chili sauce: 2 teaspoons;
– Oyster sauce: 1 tablespoon;
– Honey: 1 tablespoon;
– Spices: cooking oil, sugar, seasoning, monosodium glutamate, pepper.

Preparation

Put some oil in a pan, then add the finely chopped onions, garlic, lemongrass and chili pepper and sauté until fragrant.
Then continue adding 5 tablespoons of soy sauce, 2 tablespoons of water, 3 teaspoons of chili satay, 2 teaspoons of Korean chili sauce, 2 tablespoons of sugar, 1 teaspoon of seasoning and half a teaspoon of MSG.
Bring this mixture to a boil, then reduce the heat to low and season to taste (this mixture will be used as a sauce to dip the grilled meat and vegetables in, and also used as a marinade if you have any leftovers; it can be stored in the refrigerator and used for 3-5 days)

Now we have to prepare the bacon and the beef: wash them (I use to rinse all the meat before eating it) and slice them as you like.
Put the spice mix just prepared on top of the meat to marinate it. And add the oyster sauce and honey. Mix well so that the meat absorbs evenly. Marinate the meat for about 30 minutes to be able to grill it.

Place the meat on the griddle, grill until golden brown on both sides. During cooking, you can add a layer of marinade sauce on the meat, so that the meat does not dry out.
After grilling, place on a plate, along with the sauce and kimchi (which I will tell you about in another post in the future).

Now you can enjoy the grilled meat roll with kimchi. Very simple and easy to make.

Thịt nướng ăn cùng kim chi.
Chuẩn bị nguyên liệu 
* Rau xà lách, dưa leo rửa sạch, thái dưa leo
* Kim chi (cần làm trước 3 ngày hoặc mua tại siêu thị người Châu Á)
* 2 quả trứng luộc và cắt thành từng miếng
* Thịt ba chỉ : 130 gram
* Thịt bò gân: 130 gram
* Hành củ thái nhỏ: 3 muỗng cà phê
* Tỏi thái nhỏ: 2 muỗng cà phê
* Sả thái nhỏ: 1 muỗng cà phê
* Ớt tươi: thái nhỏ 2 quả
* Ớt sa tế: 3 muỗng cà phê
* Tương ớt hàn quốc: 2 muỗng cà phê
* Dầu hào: 1 muỗng canh
* Mật ong: 1 muỗng canh
* Gia vị: dầu ăn, đường, hạt nêm, bột ngọt, tiêu.

* Thịt ba chỉ và thịt bò rửa sạch, thái lát vừa ăn.
* Cho dầu lên chảo, rồi cho hành, tỏi, sả, ớt đã thái nhuyễn ở trên vào, xào cho thơm. Sau đó tiếp tục cho 5 muỗng canh nước tương, 2 muỗng canh nước lọc, 3 muỗng cà phê ớt sa tế, 2 muỗng cà phê tương ớt hàn quốc, 2 muỗng canh đường, 1 muỗng cà phê hạt nêm, nửa muỗng cà phê bột ngọt. Nấu cho hỗn hợp này sôi rồi hạ lửa nhỏ lại, nêm nếm cho vừa khẩu vị. Sau đó tắt bếp. (Hỗn hợp này sẽ dùng làm nước chấm ăn kèm với cuốn thịt nướng và rau, đồng thời dùng để ướp, nếu còn dư có thể bảo quản trong tủ lạnh và dùng trong 3-5 ngày) 
* Cho phần hỗn hợp gia vị vừa làm ở trên vào phần thịt. Và cho thêm dầu hào và mật ong đã chuẩn bị ở trên. Trộn đều để thịt được thấm đều gia vị. Ướp thịt trong khoảng 30 phút là có thể nướng.
* Xếp thịt lên vỉ, nướng vàng đều 2 mặt. Trong lúc nướng có thể quét thêm 1 lớp xốt gia vị ướp lên thịt, để thịt không bị khô.
* Sau khi nướng xong, cho ra đĩa, cùng với nước sốt ở trên và kim chi là có thể thưởng thức món thịt nướng cuộn kim chi. Rất đơn giản và dễ làm.

Vietnamese recipe: grilled meat with kimchi – Recette vietnamienne : viande grillée au kimchi – Receta vietnamita: carne a la parrilla con kimchi – Receita vietnamita: carne grelhada com kimchi – Vietnamesisches Rezept: gegrilltes Fleisch mit Kimchi – Món Việt: thịt nướng kim chi – 越南食谱:泡菜烤肉 – ベトナム料理 キムチ焼き肉

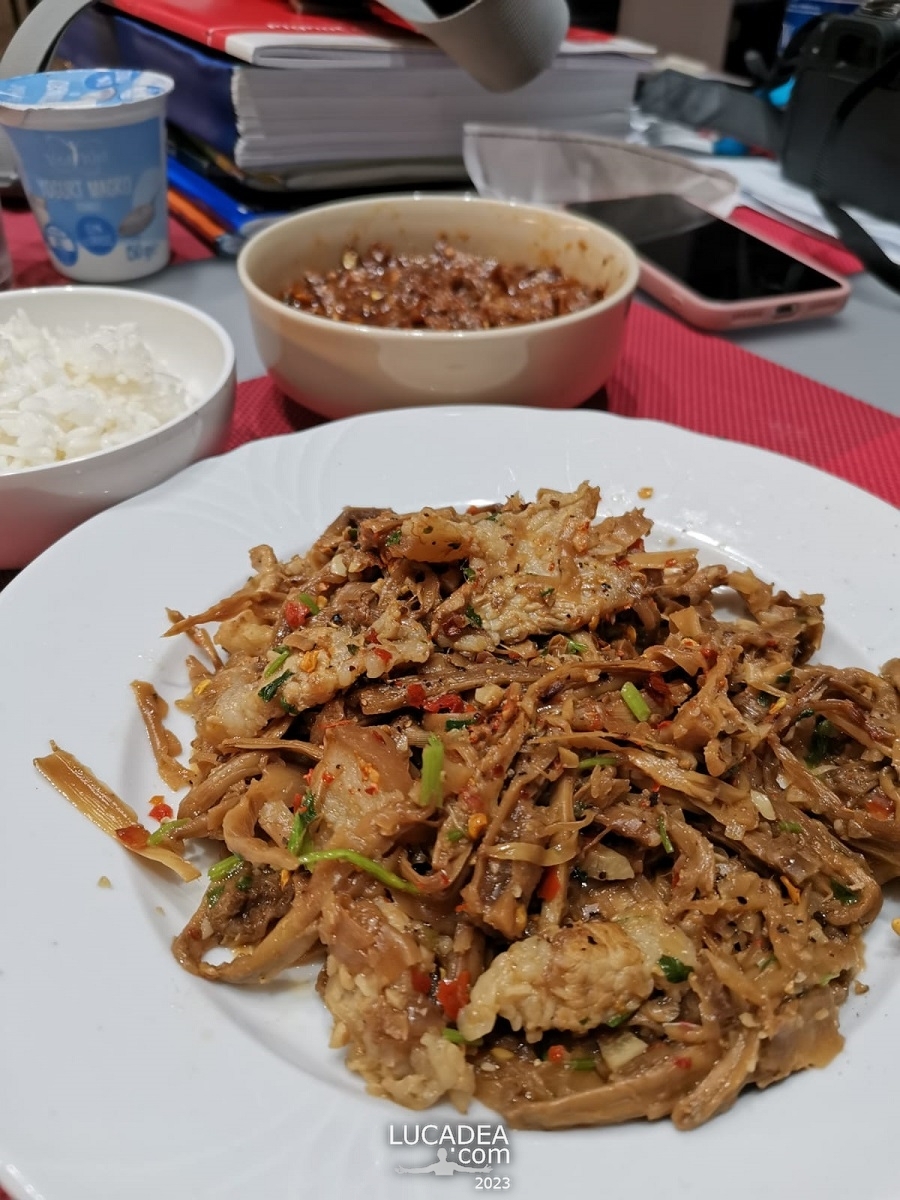
Vietnamese Cuisine: Shiitake Mushrooms, The Recipe

Ricetta Vietnamita: i funghi shiitake brasati e piccanti

Vietnamese Cuisine: Braised and Spicy Shiitake Mushrooms, the Recipe.

Click vào đây để đọc bằng tiếng việt!
If you are curious about this recipe of mine or Vietnamese food in general, write me a message. comment or go to the bottom of the site to read what other visitors have written.

Ingredients

– 50 g of shiitake mushrooms (if you don't know what they are click here);
– Finely chopped shallot;
– Olive oil;
– Garlic;
– 2 finely chopped chilli peppers (if you don't like chilli pepper you can leave it out);
– Spices: sugar, seasoning, monosodium glutamate, soy sauce, chilli pepper, satay, pepper.

Preparation

First prepare the shiitake mushrooms by softening them in water, washing them and draining them; cut the bottom of the mushrooms and then cut them into small pieces.

Place the pan on the stove, add a teaspoon of olive oil, heat until the oil is hot, then add a teaspoon of sugar and cook until the sugar turns yellow, then reduce the heat.
Add the shallots, finely chopped chili pepper and minced garlic; fry until fragrant.
Now add the shiitake mushrooms to the pan, 1/2 tablespoon of seasoning, 1/2 teaspoon of sugar, 1/2 teaspoon of MSG, stir-fry until the mushrooms are firm.
For the final cooking add another 2 tablespoons of soy sauce, 2 tablespoons of water, 1 tablespoon of satay chili pepper (if you eat less spicy, you can add just a little chili pepper) and (if you have it) some stock.
Continue cooking for a few minutes on low heat and finish with a sprinkle of ground pepper.

A great dish to enjoy!

Ricetta Vietnamita: i funghi shiitake brasati e piccanti

Ricetta Vietnamita: i funghi shiitake brasati e piccanti

Ricetta Vietnamita: i funghi shiitake brasati e piccanti

Nấm đông cô kho cay.

* 50g nấm đông cô
* Hành lá thái nhuyễn
* Tỏi và 2 quả ớt thái nhuyễn (không ăn ớt không cho vào)
* Gia vị: Đường, hạt nêm, bột ngọt, nước tương, ớt sa tế, tiêu.

Nấm đông cô ngâm mềm, rửa sạch và vắt ráo nước, cắt bỏ phần chân nấm sau đó thái nấm thành từng miếng vừa ăn.

Bạn bắc chảo lên bếp, cho vào 1 muỗng cà phê dầu ăn, đun cho dầu ăn nóng lên thì bạn cho vào chảo 1 muỗng cà phê đường, nấu đến khi đường ngả màu vàng thì bạn vặn lửa thật nhỏ rồi bỏ hành lá, ớt cắt nhỏ và tỏi băm vào phi thơm.
Tiếp theo, bạn cho phần nấm đông cô đã thái vào chảo sau đó thêm vào 1/2 muỗng canh hạt nêm, 1/2 muỗng cà phê đường, ½ muỗng cà phê bột ngọt, xào cho nấm săn lại thì bạn cho vào chảo 2 muỗng canh nước tương, 2 muỗng canh nước, 1 muỗng ớt sa tế (nếu ăn cay ít có thể cho ít ớt) và kho với lửa nhỏ và nêm nếm lại lần nữa cho vừa ăn, sau đó cho ít tiêu xay vào là xong và có thể cho ra đĩa thưởng thức.

Vietnamese recipe: braised and spicy shiitake mushrooms – Recette vietnamienne : champignons shiitake braisés et épicés – Receta vietnamita: champiñones shiitake estofados y picantes – Receita vietnamita: cogumelos shiitake assados ​​e picantes – Vietnamesisches Rezept: Geschmorte und scharfe Shiitake-Pilze – Công thức món Việt: nấm đông cô kho cay – 越南食谱:香辣香菇 – ベトナムのレシピ: シイタケのスパイシー煮込み

Vietnamese cuisine: Mì quảng gà, the recipe

Ricetta Vietnamita: Mì quảng gà, noodles con zuppa di pollo

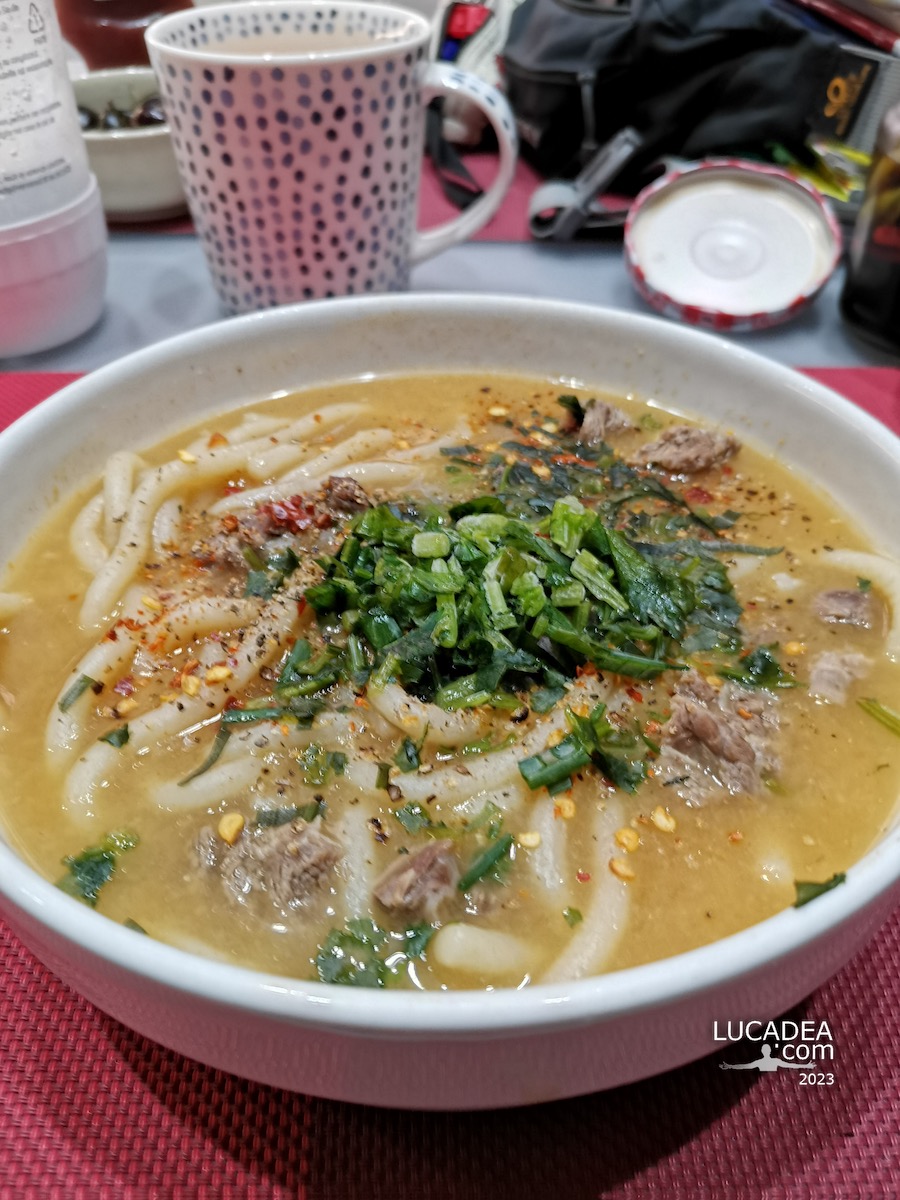
Vietnamese Cuisine: Mì quảng gà, Chicken Soup Noodles, Recipe.
If you have ever tasted Quang noodles from the central region of Vietnam, it will be hard to forget that special taste.
Today I cooked Quang chicken and egg noodles to enjoy on a cold day so as not to miss my hometown too much.
There will be some ingredients missing compared to Vietnam but the taste is complete: I will use tagliatelle instead of noodles.

Click vào đây để đọc bằng tiếng việt!
If you are curious about this recipe of mine or Vietnamese food in general, write me a message. comment or go to the bottom of the site to read what other visitors have written.

Ingredients

– Chicken: 350 – 400 grams, boiled and cut into bite-sized pieces (choose the part you prefer);
– 1 nest of noodles for each person;
– Chicken bones: 300 gr washed and drained;
– a few pork ribs.
– Chicken eggs: 3, boiled and peeled.
– Pineapple: 1/3 of the fruit
– 2 purple onions;
– A couple of cloves of minced garlic;
– Roasted and cleaned peanuts;
– Fresh chili pepper, fresh lemon
– Raw vegetables: aromatic herbs, lettuce, shallots… pick the leaves, wash, drain.
– Finely chopped shallots;
– Condiments: fish sauce, annatto seeds, soy sauce, seasoning (classic stock cube), monosodium glutamate, sugar, satay, pepper, peanut oil, corn starch.

Preparation

Add the chicken and hard boiled eggs to the dressing: 2 tablespoons fish sauce, 2 tablespoons soy sauce, 1 teaspoon water, 1/2 teaspoon seasoning, 1/2 teaspoon MSG, 2 teaspoons sugar, chopped onion and garlic, 2 tablespoons satay, 1 pinch pepper and marinate for about 30 minutes to infuse the spices (don't worry if it looks like there's a lot of spices because this seasoning will be added to the broth).
Prepare a pot of water, put the chicken bones and pork ribs in the pot and bring to a boil and when the white foam starts to form, remove it. Add the two purple onions, 1/3 of the pineapple and lower the heat to minimum, proceed to simmer for about 40 minutes.
Now put a pan on the heat, add the peanut oil and fry the chopped onion and garlic until golden.
Remove a little of this soffritto (and you will use it to season the final dish) while to the remainder add the marinated chicken and the eggs; add a generous spoonful of bone broth and cook until everything boils, then reduce the heat and continue to simmer for 5-7 minutes to dry out and absorb the excess liquid.
Add half a teaspoon of cornstarch to the broth to thicken it all up.
Add the classic stock cube and annatto seeds, fish sauce and a little salt and MSG to taste, then add about a teaspoon of peanut oil.
Stir well to combine the spices and turn off the heat.
Prepare another pot of boiling water, boil the tagliatelle until soft, then take them out and put them in a large bowl.
Add the chicken, eggs, raw vegetables, add the broth; the sautéed onion and garlic, finely chopped shallots, peanuts, satay, fresh chilli and squeeze a little lime juice for extra rich flavour.

Here is the finished dish!

Ricetta Vietnamita: Mì quảng gà, noodles con zuppa di pollo

Ricetta Vietnamita: Mì quảng gà, noodles con zuppa di pollo

Mì quảng gà.

Nếu bạn đã từng thưởng thức món mì Quảng của miền Trung thì chắc hẳn sẽ khó quên được hương vị đặc biệt ấy. Hôm nay tôi đã nấu món mì Quảng gà và trứng để thưởng thức cho một ngày lạnh và nhớ quê hương.
Nguyên liệu sẽ thiếu so với ở Việt Nam nhưng hương vị thì trọn vẹn, mì tôi sẽ dùng pasta taglietele thay thế.

Nguyên liệu cho tầm 3 người ăn:
* Thịt gà: 350 – 400 gram, lọc xương nếu có để ninh nước dùng và cắt nhỏ thịt từng miếng vừa ăn (chọn phần thịt bạn yêu thích)
* 1 cuộn tagliatele/1 phần ăn
* Xương heo: 300g rửa sạch để ráo (nếu có xương gà càng tốt)
* Trứng gà: 3 quả, luộc và bóc vỏ.
* Dứa: 1/3 quả
* Hành tím: 2 quả
* Hành tỏi băm nhuyễn
* Đậu phộng đã rang hạt và làm sạch.
* Ớt tươi, chanh tươi
* Rau sống: rau thơm, xà lách, hành lá…nhặt lấy lá, rửa sạch, để ráo nước.
* Hành lá thái nhỏ
* Gia vị: nước mắm, nước tương, hạt nêm (dado classico), bột ngọt, đường, sa tế, tiêu, dầu điều, bột bắp.
* Cho thịt gà cùng trứng đã luộc vào gia vị: 2 muỗng canh nước mắm, 2 muỗng canh nước tương, 1 muỗng cà phê nước màu (nước đường phi kẹo lại), 1/2 muỗng cà phê hạt nêm, 1/2 muỗng cà phê bột ngọt, 2 muỗng cà phê đường, hành và tỏi băm, 2 muỗng sa tế, 1 xíu tiêu và ướp khoảng 30 phút cho thấm gia vị. (Đừng lo lắng vì nhiều gia vị, sau đó gia vị này sẽ được cho vào nồi nước dùng)
* Chuẩn bị nồi nước, cho xương heo và xương gà vào nồi bật lửa nấu sôi. Nước sôi mở vun vớt bỏ bớt bọt trắng. Cho vào 2 củ hành tím, 1/3 quả dứa và hạ lửa nhỏ xuống tiến hành ninh khoảng 40 phút.
* Tiếp tục, bạn bắt chảo lên bếp, thêm vào dầu ăn và cho hành tỏi băm vào phi vàng: một nửa để lại để xíu ăn kèm, và dùng một nửa còn lại để xào gà và trứng đã ướp ở trên, và sau đó cho thêm 1 vá lớn nước ninh xương, nấu đến khi sôi thì vặn nhỏ lửa lại và bạn chắt bớt nước gia vị trong chảo và cho lại vào nồi nước xương đang ninh. Còn phần gà và trứng trong chảo bạn tiếp tục để riu riu lửa trong tầm 5-7 phút cho ráo và thấm gia vị trứng và gà là được.
* Sau khi đã ninh đủ thời gian, bạn cho thêm nửa muỗng cà phê bột bắp vào nước dùng cho nồi nước được sánh và sệt lại. Sau đó tiến hành nêm nếm gia vị một lần nữa: cho vào thêm dado classico hoặc hạt nêm, nước mắm và 1 chút muối và bột ngọt vừa ăn, rồi thêm vào nồi khoảng 1 thìa cà phê dầu điều.
* Đảo đều cho các gia vị hòa quyện vào nhau và tắt bếp.
* Chuẩn bị một nồi nước sôi khác, cho taglietele vào luộc chín mềm rồi vớt ra để vào bát lớn. Thêm vào thịt gà, trứng, rau sống, chan nước dùng vào và cho thêm hành tỏi đã phi thơm ở trên, hành lá thái nhỏ, đậu phộng, sa tế, ớt tươi và vắt thêm một ít nước cốt chanh cho hương vị thêm đậm đà hơn nhé.

Vietnamese recipe: Mì quảng gà, noodles with chicken soup – Recette vietnamienne : Mì quảng gà, nouilles à la soupe de poulet – Receta vietnamita: Mì quảng gà, fideos con sopa de pollo – Receita vietnamita: Mì quảng gà, macarrão com canja de galinha – Vietnamesisches Rezept: Mì quảng gà, Nudeln mit Hühnersuppe – Công thức món Việt: Mì quảng gà, mì quảng gà – 越南食谱:Mì quảng gà,鸡汤面 – ベトナムのレシピ: チキンスープのミークアンガ –

Vietnamese cuisine: Chả giò, the recipe

Involtini primavera di maiale e gamberi

Vietnamese Cuisine: Pork and Shrimp Spring Rolls, the Recipe.
Shrimp and meat spring rolls are a famous dish in central Vietnam, my hometown in Quang Nam-Da Nang. When I was a child, for every family fest, they were prepared together with many dishes to enjoy. Today it has become more popular with every family meal and it is also easy to find them frozen.
They are usually prepared with pork, shrimp and some ingredients that unfortunately I do not have at my disposal exactly like in Vietnam, but the taste remains the same!

Click vào đây để đọc bằng tiếng việt!
If you are curious about this recipe of mine or Vietnamese food in general, write me a message. comment or go to the bottom of the site to read what other visitors have written.

Ingredients

– 500g lean pork mince or ground beef;
– 1 small carrot, thinly sliced ​​or grated;
– 1 small taro, thinly sliced ​​or grated (bought at Asian stores, and if you don’t know what that is go to Wikipedia);
– 2 chicken eggs;
– 1 handful of finely chopped shallots and cilantro;
– A few purple onions and garlic: chopped;
– Olive oil;
– Spices: seasoning, sugar, pepper, fish sauce, MSG;
– 1-2 stacks of rice paper rolls with ram (bought at Asian meat supermarkets).

Preparation

Mix the meat mixture, carrots, taro, cilantro, eggs, onions and minced garlic then season with: 1.5 tablespoons fish sauce, 1.5 teaspoons seasoning, 1/2 teaspoon MSG, 1/3 teaspoon sugar, 1/2 teaspoon pepper and mix well.

Leave the mixture in the fridge for 10 minutes to allow the spices to flavour the entire mixture.
For each piece of rice paper, put a little of the aforementioned mixture, spread evenly. Then, fold the two ends and roll them up in the best way and place them on a plate.
Place a non-stick pan on the stove with olive oil (the amount of oil must be enough to cover the rolls), at medium/high temperature, then fry the rolls in turn until golden brown. Arrange them on a plate and eat with homemade satay (which I have already described in a previous post) or eat with Detchland's sweet and sour chili sauce (purchased at Coop supermarkets or Asian supermarkets).
Note: if you don't like the taste of taro, you can add carrots instead. Once you have grated the carrots and taro, remember to squeeze out the water so that when you mix the mixture it is not too wet making it difficult to fry. The mixture is perfect when it is neither too dry nor too wet and has the sticky consistency of egg. To make sure that the seasoning is right, after mixing the mixture, you can first roll one and fry it to try the spices again to adapt them to your taste.

Involtini primavera di maiale e gamberi

Bánh cuốn ram (tôm) thịt

Bánh cuốn ram tôm thịt là một món ăn nổi tiếng miền Trung Việt Nam, Quảng Nam-Đà Nẵng quê tôi. Lúc còn bé mỗi dịp gia đình có lễ là thường làm cuốn ram cùng nhiều món để thưởng thức và ngày nay nó trở nên phổ biến hơn với mỗi bữa cơm gia đình và thậm chí nó còn được đóng gói chế biến sẵn.

Thông thường nó được gọi là ram tôm thịt vì có cả tôm và thịt, nhưng hôm nay tôi chỉ làm chả ram thịt, và sẽ có thiếu một vài nguyên liệu cho ra chính xác như ở Việt Nam nhưng hương vị vẫn không đổi nhé!
Nguyên liệu đủ cho tầm 3 người ăn:
* 500g thịt nạc heo băm nhuyễn hoặc xay nhỏ
* 1 củ cà rốt nhỏ thái sợi mỏng hoặc bào mỏng
* 1 củ khoai môn nhỏ thái sợi mỏng hoặc bào mỏng (mua tại tiệm người Á)
* 2 quả trứng gà
* 1 nắm hành lá và ngò thái nhuyễn
* Vài củ hành tím và tỏi: băm nhỏ
* Gia vị: hạt nêm, đường, tiêu, nước mắm, bột ngọt.
* 1-2 xấp bánh tráng cuốn chả ram (mua tại các siêu thịt người Á)
* Trộn hỗn hợp thịt, cà rốt, khoai môn, hành ngò, 2 quả trứng, hành và tỏi băm, sau đó nêm gia vị: 1,5 muỗng canh nước mắm, 1,5 muỗng cà phê hạt nêm, 1/2 muỗng cà phê bột ngọt, 1/3 muỗng cà phê đường, 1/2 muỗng cà phê tiêu rồi trộn đều.
* Để hỗn hợp trong tủ lạnh 10 phút cho thấm đều gia vị.
* Với mỗi miếng bánh tráng, bạn cho vào 1 ít hỗn hợp trên, dàn đều tạo hàng. Tiếp đó, bạn gấp 2 đầu và cuộn tròn lại sao cho thật đẹp mắt và xếp chúng vào đĩa, sau đó mang đi chiên.
* Bạn cho chảo chống dính lên bếp kèm dầu ăn (lượng dầu đủ ngập các cuốn ram), để lửa vừa, dầu sôi thì lần lượt cho chả ram vào chiên cho vàng rồi vớt ra.
* Sau đó sắp xếp ra đĩa và ăn cùng với sa tế nhà làm (tôi đã viết cách làm trong một bài trước) hoặc ăn cùng tương ớt chua ngọt của Detchland (mua tại các siêu thị Coop hoặc siêu thị người Á).
* Lưu ý: Nếu bạn không thích khoai môn, có thể cho thêm cà rốt thay thế. Và khi đã bào sợi cà rốt và khoai môn ra, nhớ vắt nước cho ráo để khi trộn hỗn hợp không quá bị ẩm sẽ khó chiên. Hỗn hợp đạt chuẩn khi nó không quá khô hay quá ẩm và có độ dẻo kết dính từ trứng. Để đảm bảo gia vị vừa ăn thì sau khi trộn hỗn hợp xong bạn có thể cuốn 1 cái trước và chiên để thử lại các gia vị cho phù hợp gia đình mình.

Vietnamese recipe: pork and shrimp spring rolls – Recette vietnamienne : nems au porc et aux crevettes – Receta vietnamita: rollitos de primavera de cerdo y gambas – Receita vietnamita: rolinhos primavera de carne de porco e camarão – Vietnamesisches Rezept: Frühlingsrollen mit Schweinefleisch und Garnelen – Công thức món Việt: chả giò tôm thịt – 越南食谱:猪肉和大虾春卷 – ベトナムのレシピ:豚肉と海老の春巻き

Vietnamese Cuisine: Pan-fried Corn, the Recipe

Ricetta Vietnamita: un contorno sfizioso di mais saltato in padella

Vietnamese cuisine: a delicious side dish of stir-fried corn, the recipe.
Today I decided to tell you not a real recipe for a complex dish but a simple side dish (which can easily become a light meal) simple and quick to prepare.

Click vào đây để đọc bằng tiếng việt!
If you are curious about this recipe of mine or Vietnamese food in general, write me a message. comment or go to the bottom of the site to read what other visitors have written.

Ingredients

– 2 cans of sweet corn;
– 30 grams of dried shrimp (bought in a Chinese supermarket in Chiavari);
– 2 red onions
– 1 minced garlic
– Finely chopped shallot
– 2 tablespoons of margarine
– Spices: sugar, fish sauce, dried chili powder, annatto seeds, olive oil, satay.

Preparation

First you need to remove the corn from the cans and drain it well.
Place the dried shrimp in a bowl of warm water for about 3 minutes to soften them, then rinse them and remove the excess water, perhaps placing them on a tea towel.
Heat a tablespoon of olive oil in a pan and, when the oil is hot, add the chopped onion and garlic and fry until fragrant.
When the onion and garlic turn a bright yellow, start adding the dried shrimp and corn; fry for 3-5 minutes, then add a teaspoon of fish sauce, half a teaspoon of annatto, half a teaspoon of sugar, a teaspoon of satay and mix everything well.
Then taste everything to check if it needs to be adjusted sweet or salty (this depends on personal taste).
When we are sure of the flavor, add the two tablespoons of margarine to the pan and fry well.
Add a little chili powder (if you like spicy foods), the finely chopped shallots and fry for about two more minutes and the side dish is ready!
Remember: enjoy while it is still hot.

Thành phần:

* 2 lon bắp đã tách hạt
* 30 gram tép khô (mua tại siêu thị người Hoa ở Chiavari)
* 2 Củ hành tím, 1 củ tỏi: băm nhỏ
* Hành lá thái nhuyễn
* 2 muỗng canh bơ thực vật
* Gia vị: Đường, nước mắm, bột ớt khô, hạt nêm, dầu ăn, sa tế.

Cách làm:

Cho bắp ra rổ và để ráo nước.
Cho tép khô vào ngâm trong bát nước ấm khoảng 3 phút cho nở mềm rồi rửa sạch, vớt ra rổ cho ráo nước.
Bắc chảo cho 1 muỗng canh dầu ăn, khi dầu nóng, bạn cho hành và tỏi đã băm nhỏ vào phi thơm.
Khi hành tỏi chuyển sang màu vàng bắt mắt, bạn bắt đầu cho tép khô, bắp vào xào chín tầm 3-5 phút rồi bạn cho vào 1 muỗng cà phê nước mắm, ½ muỗng cà phê hạt nêm, ½ muỗng cà phê đường, 1 muỗng cà phê sa tế trộn đều. Sau đó nêm nếm lại gia vị mặn ngọt vừa ăn.
Kế tiếp, bạn cho 2 muỗng canh bơ thực vật vào chảo bắp, xào cho thật đều. Sau đó, bạn cho thêm ít bột ớt (nếu thích ăn cay nhiều), hành lá cắt nhuyễn vào đảo đều, xào thêm khoảng 2 phút rồi tắt bếp là hoàn tất cách làm bắp xào bơ.
Cho ra đĩa và thưởng thức khi còn nóng.

Vietnamese recipe: a delicious side dish of sautéed corn – Recette vietnamienne : un délicieux accompagnement de maïs sauté – Receta vietnamita: una deliciosa guarnición de maíz salteado – Receita vietnamita: um delicioso acompanhamento de milho salteado – Vietnamesisches Rezept: eine köstliche Beilage aus sautiertem Mais – Công thức món ăn Việt Nam: món bắp xào thơm ngon – 越南食谱:美味的炒玉米配菜 – ベトナムのレシピ: コーンのソテーのおいしいおかず