Thai Cuisine: Short Rib Soup, The Recipe

Ricetta Thailandese: zuppa di costolette di maialino

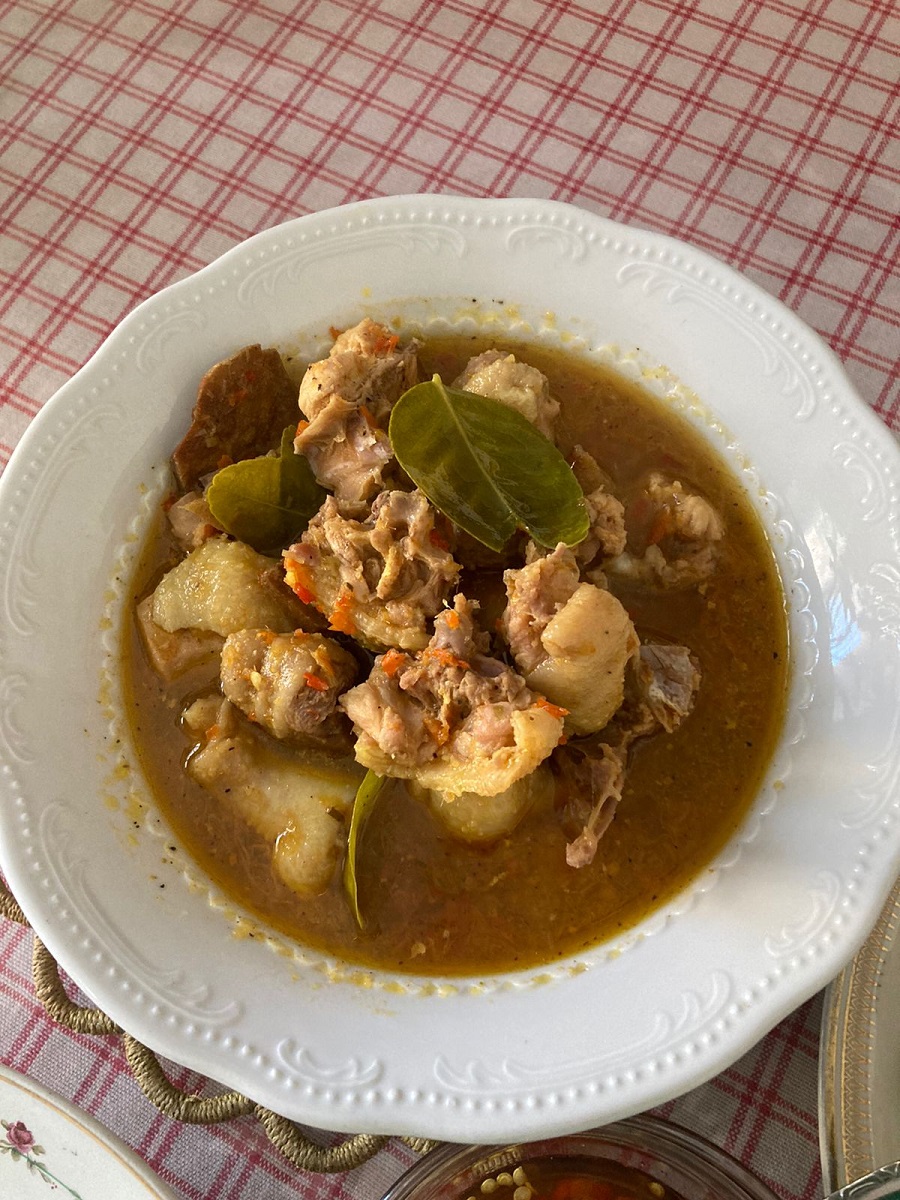
Thai cuisine: pork rib soup, the recipe.
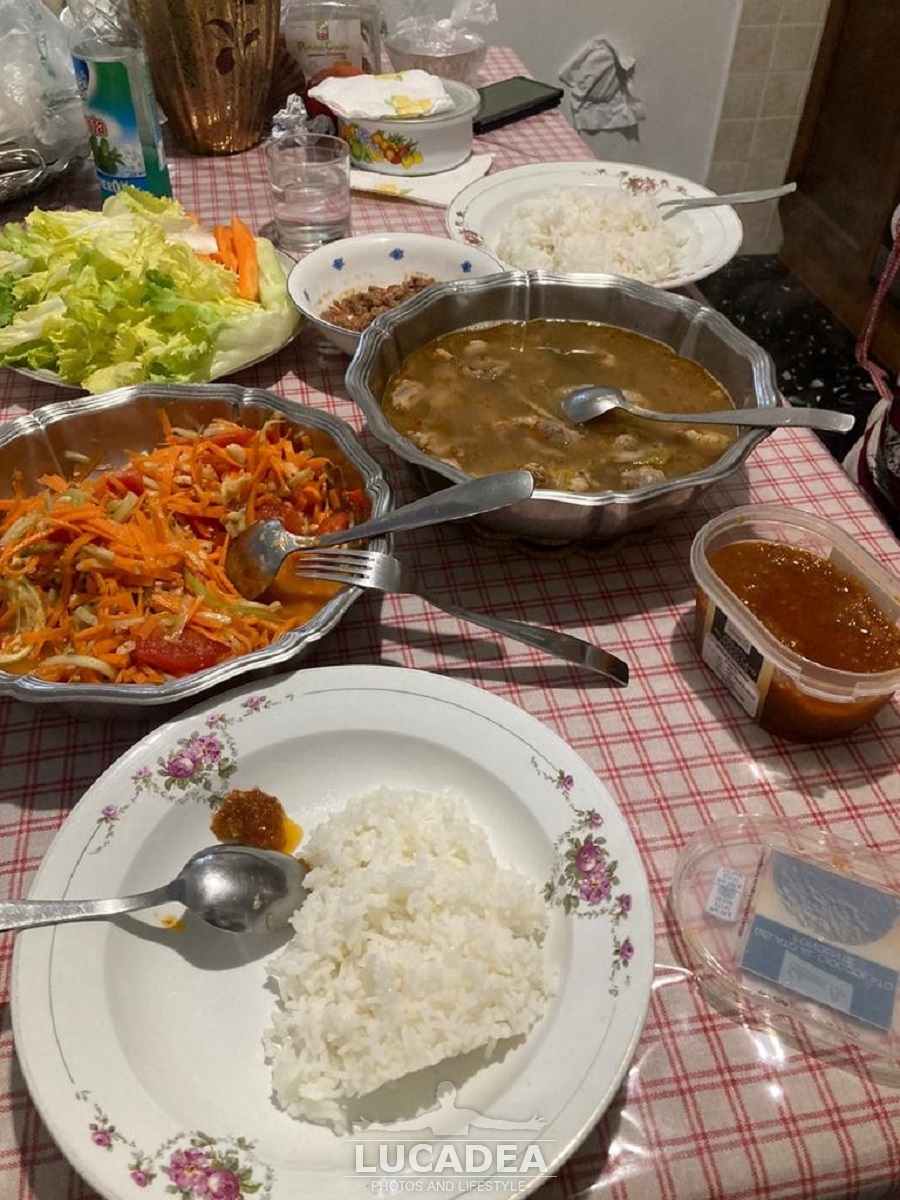
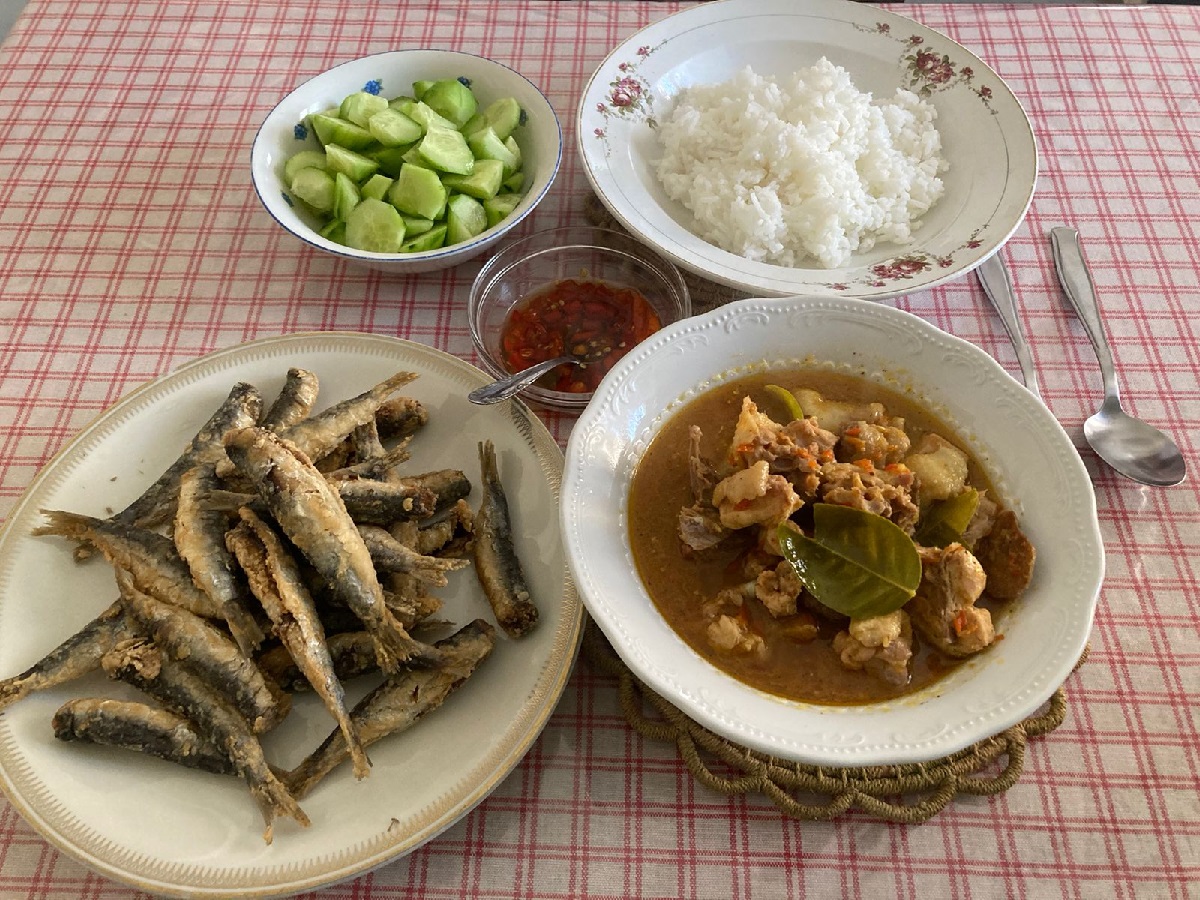
A few days ago I also went to eat at my Thai friend Sao's house and, together with her, we prepared an excellent Thai dish. As a side dish there was also a nice salad typical of her country, the som tam, (but I will write a separate article about it when I find the inspiration) some fried anchovies (maybe these more typical of our Riviera) and rice.
We had a delicious lunch on a cold winter day.

Click vào đây để đọc bằng tiếng việt!
If you are curious about this recipe of mine or Vietnamese food in general, write me a message. comment or go to the bottom of the site to read what other visitors have written.

Ingredients

– 250 grams of pork ribs (preferably from a young specimen);
– 2 cloves of garlic;
– 1 red onion;
– 6 fresh chillies;
– 2 lemongrass plants cut into pieces;
– 3 lemon leaves;
– Olive oil
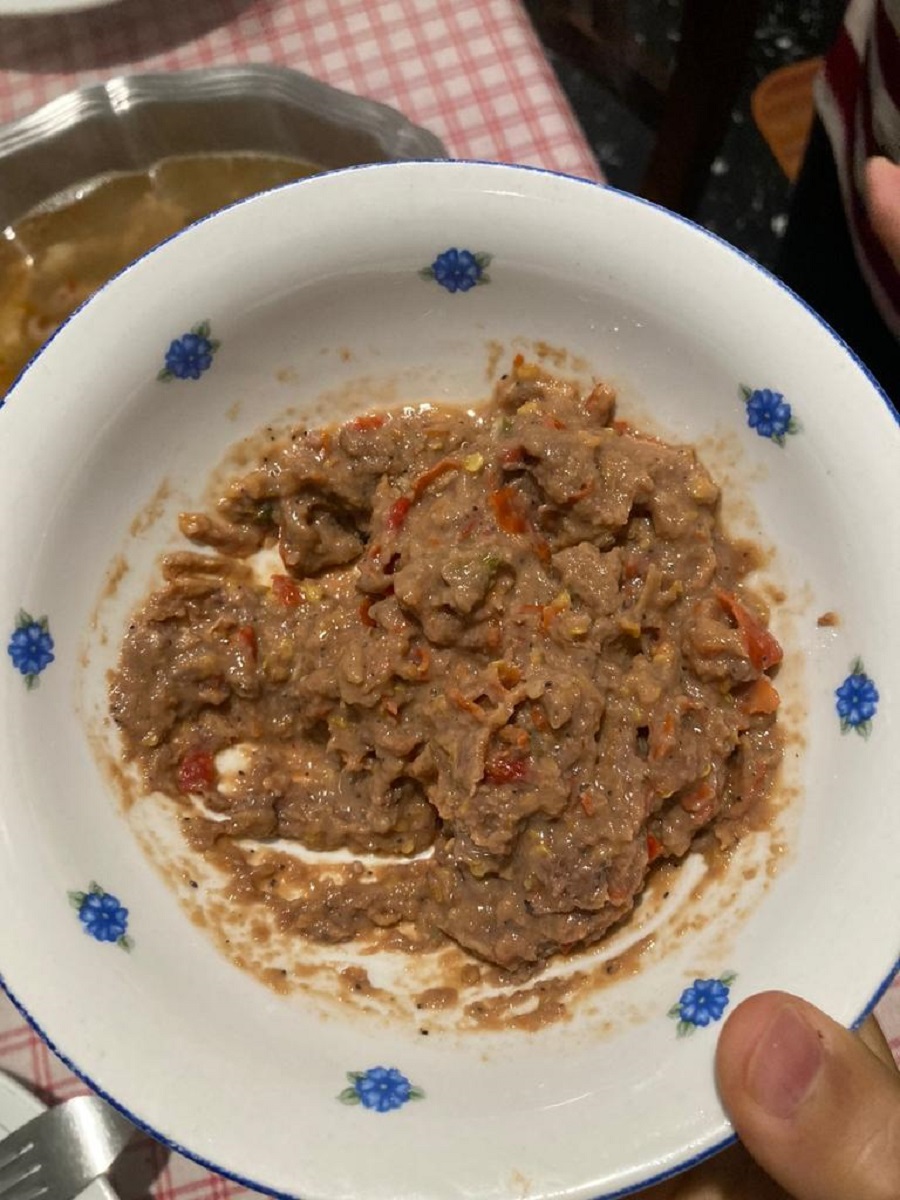
– Spices: salt, monosodium glutamate, sugar, prawn paste (pictured), fish sauce, pepper.

As always, some ingredients are a little difficult to find. I sometimes go to Genoa where there are more shops where I can find many interesting things that in my town they just don't know.

Preparation

First, let's start cooking the rice in the appropriate kettle.

Then we prepare the spices: put the garlic, red onion, fresh chili pepper and lemongrass in a blender and chop finely. Then put the mixture in a saucepan and fry with olive oil until fragrant, add about 1.5 liters of water.
Add the cleaned ribs and other seasonings: 1 teaspoon salt, 1 teaspoon MSG, 1/2 teaspoon sugar, 1 tablespoon shrimp paste, add lemon leaves.
Cook until the mixture comes to a boil, reduce the heat and cook for another 15 minutes until the meat is tender, then add 2 tablespoons fish sauce and pepper to taste.

The preparation of young pork ribs (spicy) is very similar to Thai chicken curry (which I told you about here) but differs in some spices. Most Thai dishes are cooked spicy and fragrant with shrimp paste (pictured) and the aroma of lemon leaves and lemongrass.
If you eat it a couple of times you become addicted to Thai food very easily!

Canh sườn non cay

– 250gram sườn heo non
– 2 tép tỏi
– 1 củ hành tím
– 6 quả ớt tươi
– 2 cây sả cắt thành nhiều khúc nhỏ
– Lá chanh: 3 lá
– Gia vị: muối, bột ngọt, đường, mắm tôm, nước mắm, tiêu
– (Một số gia vị phải mua tại Genova)
Cách nấu:
Cho tất cả: tỏi, hành tím, ớt tươi, sả vào máy xay và xay nhỏ. Sau đó cho hỗn hợp vào xoong và xào với dầu ăn cho đến khi vàng thơm, cho lượng nước khoảng 1,5 lít, nấu xôi sau đó cho sườn non đã làm sạch vào và nêm gia vị: 1 muỗng cà phê muối, 1 muỗng cà phê bột ngọt, 1/2 muỗng cà phê đường, 1 muỗng canh mắm tôm, cho lá chanh vào. Nấu đến khi hỗn hợp sôi lên, hạ nhỏ lửa và nấu trong 15 phút hơn cho thịt mềm, sau đó cho thêm 2 muỗng canh nước mắm và nêm nếm lại gia vị vừa khẩu vị gia đình, thêm tiêu và hoàn tất món ăn.
Món sườn non nấu cay, cũng tương tự như món cà ri gà của Thái lan, nhưng có một số gia vị không cho vào. Hầu hết các món ăn của Thái được nấu cay và thơm mùi mắm tôm, và mùi thơm của các loại lá và sả, ăn một vài lần là nghiện món ăn của người Thái.

Hôm nay, cô Sau nấu món này, cùng với món cá cơm chiên bột, món rau trộn salad Thái (somtam) và cơm. Chúng tôi đã có một buổi trưa thật ngon miệng trong ngày đông lạnh giá.

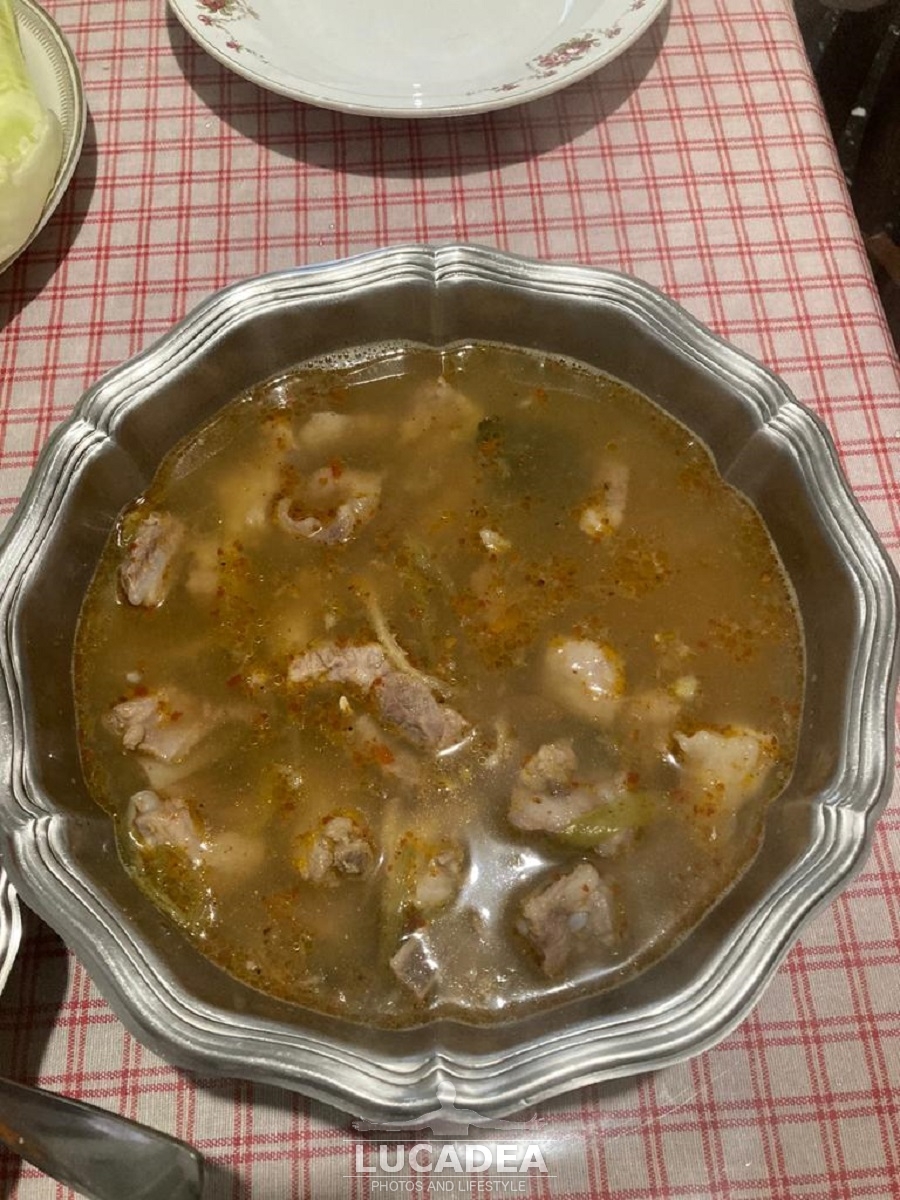
Thai recipe: pork rib soup – Recette thaïlandaise : soupe de côtes de porc – Receta tailandesa: sopa de costillas de cerdo – Receita tailandesa: sopa de costela de porco – Thailändisches Rezept: Schweinerippchensuppe – Công thức món Thái: súp sườn heo – 泰式食谱:排骨汤 – タイのレシピ: ポークリブ スープ

Thai Cuisine: Spicy Thai Chicken Curry, The Recipe

Ricetta Thailandese: pollo thai al curry piccante

Thai Cuisine: Spicy Thai Chicken Curry, The Recipe

Today I was invited to eat at my Thai friend's house, Sao, who prepared a really good and exceptionally spicy dish for me: chicken with spicy Thai curry. And as you can see in the photos there was also a plate of fried anchovies, as a side dish.

Click vào đây để đọc bằng tiếng việt!
If you are curious about this recipe of mine or Vietnamese food in general, write me a message. comment or go to the bottom of the site to read what other visitors have written.

Ingredients

– 1 whole chicken (preferably a hen), cleaned and cut into pieces;
– 5 cloves of garlic;
– 2 shallots;
– 1/4 onion;
– 6 fresh chili peppers;
– 2 lemongrass plants, cut into small pieces;
– 5 lemon leaves;
– Galangal: half a small tuber, cut into slices (if you don't know what it is, go here)
– Spices: salt, monosodium glutamate, sugar, shrimp paste, fish sauce, pepper (I can only find some spices in Genoa).
– Obviously some white rice (preferably the sticky kind).

Preparation

First, cook the rice in the classic Asian rice cooker.
Then we prepare the chicken: take all the vegetables (garlic, red onion, shallots, fresh chili pepper, lemongrass) and put them in a blender and grind it with water.
Then put the mixture in a saucepan and add about 2 liters of water then add the chicken and the seasoning: 1 tablespoon of salt, 1 teaspoon of MSG, 1 teaspoon of sugar, 1.5 tablespoons of shrimp paste, add the galangal and lemon leaves. Cook until the mixture comes to a boil, lower the heat and cook for another 30 minutes until the meat is tender, then add 2 tablespoons of fish sauce and season to taste, add pepper and finish the dish.

Although curry powder is not added in Thailand, spicy chicken cooked with lots of spices is called Thai-style “chicken curry.”

The chicken after cooking is still hard (because we used chicken meat) but if you want the meat to be tender you can cook it longer. It is extremely spicy, salty and scented with lemon leaves, lemongrass and galangal, this dish is eaten on extremely cold days because it warms and cheers.

Ricetta Thailandese: pollo thai al curry piccante

Pranzo in Thailandese amica
Thailand spicy chicken curry

– 1 con gà Gallina, làm sạch và cắt miếng. (Mua tại siêu thị Coop)
– 5 tép tỏi
– 2 củ hành tím
– 1/4 củ hành tây
– 6 quả ớt tươi
– 2 cây sả cắt thành nhiều khúc nhỏ
– Lá chanh: 5 lá
– Riềng: nửa củ nhỏ và cắt thành lát.
– Gia vị: muối, bột ngọt, đường, mắm tôm, nước mắm, tiêu
– (Một số gia vị phải mua tại Genova)

Cách nấu:
Cho tất cả: tỏi, hành tím, hành tây, ớt tươi, sả vào máy xay và xay nhỏ cùng với nước. Sau đó cho hỗn hợp vào xoong và cho lượng nước khoảng 2 lít, nấu xôi sau đó cho gà vào và nêm gia vị: 1 muỗng canh muối, 1 muỗng cà phê bột ngọt, 1 muỗng cà phê đường, 1,5 muỗng canh mắm tôm, cho riềng và lá chanh vào. Nấu đến khi hỗn hợp sôi lên, hạ nhỏ lửa và nấu trong 30 phút hơn cho thịt mềm, sau đó cho thêm 2 muỗng canh nước mắm và nêm nếm lại gia vị vừa khẩu vị gia đình, thêm tiêu và hoàn tất món ăn.
Tuy không cho bột cà ri vào nhưng ở Thái lan, thịt gà nấu cay cùng với nhiều gia vị được gọi là nấu “cà ri gà” phong cách Thái. Gà sau khi nấu vẫn dai thịt (vì đây là gà gallina, nếu muốn thịt mềm có thể nấu lâu hơn) và cực kì cay, mặn mà và thơm mùi lá chanh, sả và riềng, món này ăn vào những ngày lạnh cực kì ấm áp và đầy hưởng thụ.

Thai cuisine: spicy Thai chicken curry – Cuisine thaï : curry de poulet thaï épicé – Cocina tailandesa: curry picante de pollo tailandés – Culinária tailandesa: caril de frango tailandês picante – Thai-Küche: würziges thailändisches Hähnchen-Curry – Ẩm thực Thái Lan: cà ri gà Thái chua cay – 泰国烹调:辣泰国咖喱鸡 – タイ料理:スパイシータイチキンカレー

Vietnamese Cuisine: Grilled Meat with Kimchi, the Recipe

Ricetta Vietnamita: carne alla griglia con kimchi

Vietnamese Cuisine: Grilled Meat with Kimchi, the Recipe

Click vào đây để đọc bằng tiếng việt!
If you are curious about this recipe of mine or Vietnamese food in general, write me a message. comment or go to the bottom of the site to read what other visitors have written.

Every now and then I cook this dish because it's quick and very good.
Now I'll explain how I prepare it.

Ingredients

– Lettuce, washed cucumber, sliced ​​cucumber;
– Kimchi (you need to prepare it three days in advance or you can buy it in Asian supermarkets);
– 2 hard-boiled eggs, cut into pieces;
– Bacon: 130 grams;
– Beef tendon: 130 grams;
– Finely chopped onions: 3 teaspoons;
– Finely chopped garlic: 2 teaspoons;
– Chopped chives (lemon): 1 teaspoon;
– Fresh chili pepper: finely chopped;
– Chili satay: 3 teaspoons;
– Korean chili sauce: 2 teaspoons;
– Oyster sauce: 1 tablespoon;
– Honey: 1 tablespoon;
– Spices: cooking oil, sugar, seasoning, monosodium glutamate, pepper.

Preparation

Put some oil in a pan, then add the finely chopped onions, garlic, lemongrass and chili pepper and sauté until fragrant.
Then continue adding 5 tablespoons of soy sauce, 2 tablespoons of water, 3 teaspoons of chili satay, 2 teaspoons of Korean chili sauce, 2 tablespoons of sugar, 1 teaspoon of seasoning and half a teaspoon of MSG.
Bring this mixture to a boil, then reduce the heat to low and season to taste (this mixture will be used as a sauce to dip the grilled meat and vegetables in, and also used as a marinade if you have any leftovers; it can be stored in the refrigerator and used for 3-5 days)

Now we have to prepare the bacon and the beef: wash them (I use to rinse all the meat before eating it) and slice them as you like.
Put the spice mix just prepared on top of the meat to marinate it. And add the oyster sauce and honey. Mix well so that the meat absorbs evenly. Marinate the meat for about 30 minutes to be able to grill it.

Place the meat on the griddle, grill until golden brown on both sides. During cooking, you can add a layer of marinade sauce on the meat, so that the meat does not dry out.
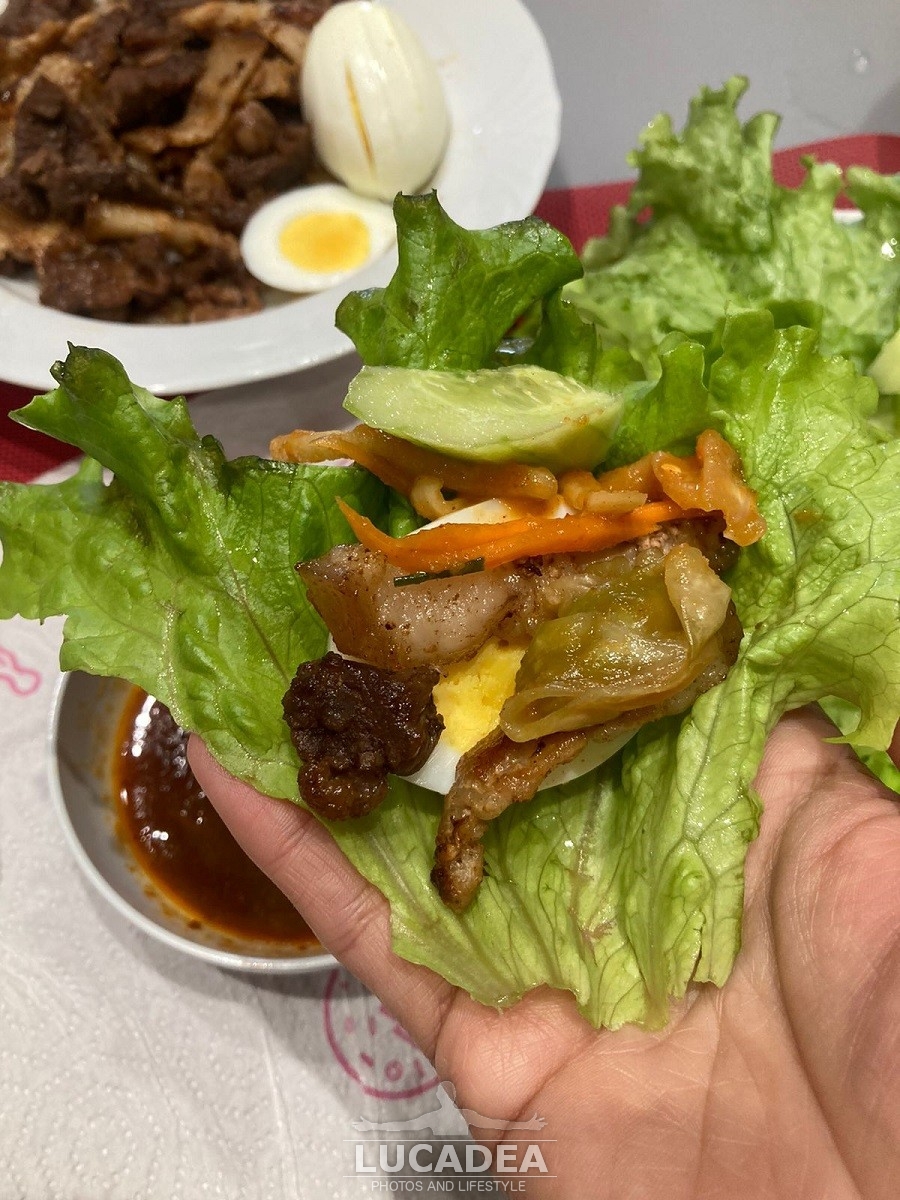
After grilling, place on a plate, along with the sauce and kimchi (which I will tell you about in another post in the future).

Now you can enjoy the grilled meat roll with kimchi. Very simple and easy to make.

Thịt nướng ăn cùng kim chi.
Chuẩn bị nguyên liệu 
* Rau xà lách, dưa leo rửa sạch, thái dưa leo
* Kim chi (cần làm trước 3 ngày hoặc mua tại siêu thị người Châu Á)
* 2 quả trứng luộc và cắt thành từng miếng
* Thịt ba chỉ : 130 gram
* Thịt bò gân: 130 gram
* Hành củ thái nhỏ: 3 muỗng cà phê
* Tỏi thái nhỏ: 2 muỗng cà phê
* Sả thái nhỏ: 1 muỗng cà phê
* Ớt tươi: thái nhỏ 2 quả
* Ớt sa tế: 3 muỗng cà phê
* Tương ớt hàn quốc: 2 muỗng cà phê
* Dầu hào: 1 muỗng canh
* Mật ong: 1 muỗng canh
* Gia vị: dầu ăn, đường, hạt nêm, bột ngọt, tiêu.

* Thịt ba chỉ và thịt bò rửa sạch, thái lát vừa ăn.
* Cho dầu lên chảo, rồi cho hành, tỏi, sả, ớt đã thái nhuyễn ở trên vào, xào cho thơm. Sau đó tiếp tục cho 5 muỗng canh nước tương, 2 muỗng canh nước lọc, 3 muỗng cà phê ớt sa tế, 2 muỗng cà phê tương ớt hàn quốc, 2 muỗng canh đường, 1 muỗng cà phê hạt nêm, nửa muỗng cà phê bột ngọt. Nấu cho hỗn hợp này sôi rồi hạ lửa nhỏ lại, nêm nếm cho vừa khẩu vị. Sau đó tắt bếp. (Hỗn hợp này sẽ dùng làm nước chấm ăn kèm với cuốn thịt nướng và rau, đồng thời dùng để ướp, nếu còn dư có thể bảo quản trong tủ lạnh và dùng trong 3-5 ngày) 
* Cho phần hỗn hợp gia vị vừa làm ở trên vào phần thịt. Và cho thêm dầu hào và mật ong đã chuẩn bị ở trên. Trộn đều để thịt được thấm đều gia vị. Ướp thịt trong khoảng 30 phút là có thể nướng.
* Xếp thịt lên vỉ, nướng vàng đều 2 mặt. Trong lúc nướng có thể quét thêm 1 lớp xốt gia vị ướp lên thịt, để thịt không bị khô.
* Sau khi nướng xong, cho ra đĩa, cùng với nước sốt ở trên và kim chi là có thể thưởng thức món thịt nướng cuộn kim chi. Rất đơn giản và dễ làm.

Vietnamese recipe: grilled meat with kimchi – Recette vietnamienne : viande grillée au kimchi – Receta vietnamita: carne a la parrilla con kimchi – Receita vietnamita: carne grelhada com kimchi – Vietnamesisches Rezept: gegrilltes Fleisch mit Kimchi – Món Việt: thịt nướng kim chi – 越南食谱:泡菜烤肉 – ベトナム料理 キムチ焼き肉

Vietnamese Cuisine: Pan-fried Corn, the Recipe

Ricetta Vietnamita: un contorno sfizioso di mais saltato in padella

Vietnamese cuisine: a delicious side dish of stir-fried corn, the recipe.
Today I decided to tell you not a real recipe for a complex dish but a simple side dish (which can easily become a light meal) simple and quick to prepare.

Click vào đây để đọc bằng tiếng việt!
If you are curious about this recipe of mine or Vietnamese food in general, write me a message. comment or go to the bottom of the site to read what other visitors have written.

Ingredients

– 2 cans of sweet corn;
– 30 grams of dried shrimp (bought in a Chinese supermarket in Chiavari);
– 2 red onions
– 1 minced garlic
– Finely chopped shallot
– 2 tablespoons of margarine
– Spices: sugar, fish sauce, dried chili powder, annatto seeds, olive oil, satay.

Preparation

First you need to remove the corn from the cans and drain it well.
Place the dried shrimp in a bowl of warm water for about 3 minutes to soften them, then rinse them and remove the excess water, perhaps placing them on a tea towel.
Heat a tablespoon of olive oil in a pan and, when the oil is hot, add the chopped onion and garlic and fry until fragrant.
When the onion and garlic turn a bright yellow, start adding the dried shrimp and corn; fry for 3-5 minutes, then add a teaspoon of fish sauce, half a teaspoon of annatto, half a teaspoon of sugar, a teaspoon of satay and mix everything well.
Then taste everything to check if it needs to be adjusted sweet or salty (this depends on personal taste).
When we are sure of the flavor, add the two tablespoons of margarine to the pan and fry well.
Add a little chili powder (if you like spicy foods), the finely chopped shallots and fry for about two more minutes and the side dish is ready!
Remember: enjoy while it is still hot.

Thành phần:

* 2 lon bắp đã tách hạt
* 30 gram tép khô (mua tại siêu thị người Hoa ở Chiavari)
* 2 Củ hành tím, 1 củ tỏi: băm nhỏ
* Hành lá thái nhuyễn
* 2 muỗng canh bơ thực vật
* Gia vị: Đường, nước mắm, bột ớt khô, hạt nêm, dầu ăn, sa tế.

Cách làm:

Cho bắp ra rổ và để ráo nước.
Cho tép khô vào ngâm trong bát nước ấm khoảng 3 phút cho nở mềm rồi rửa sạch, vớt ra rổ cho ráo nước.
Bắc chảo cho 1 muỗng canh dầu ăn, khi dầu nóng, bạn cho hành và tỏi đã băm nhỏ vào phi thơm.
Khi hành tỏi chuyển sang màu vàng bắt mắt, bạn bắt đầu cho tép khô, bắp vào xào chín tầm 3-5 phút rồi bạn cho vào 1 muỗng cà phê nước mắm, ½ muỗng cà phê hạt nêm, ½ muỗng cà phê đường, 1 muỗng cà phê sa tế trộn đều. Sau đó nêm nếm lại gia vị mặn ngọt vừa ăn.
Kế tiếp, bạn cho 2 muỗng canh bơ thực vật vào chảo bắp, xào cho thật đều. Sau đó, bạn cho thêm ít bột ớt (nếu thích ăn cay nhiều), hành lá cắt nhuyễn vào đảo đều, xào thêm khoảng 2 phút rồi tắt bếp là hoàn tất cách làm bắp xào bơ.
Cho ra đĩa và thưởng thức khi còn nóng.

Vietnamese recipe: a delicious side dish of sautéed corn – Recette vietnamienne : un délicieux accompagnement de maïs sauté – Receta vietnamita: una deliciosa guarnición de maíz salteado – Receita vietnamita: um delicioso acompanhamento de milho salteado – Vietnamesisches Rezept: eine köstliche Beilage aus sautiertem Mais – Công thức món ăn Việt Nam: món bắp xào thơm ngon – 越南食谱:美味的炒玉米配菜 – ベトナムのレシピ: コーンのソテーのおいしいおかず

Cucina vietnamita: alici stufate e piccanti, la ricetta

Ricetta vietnamita: alici stufate e piccanti

Cucina vietnamita: alici stufate e piccanti, la ricetta.

Questo è il mio primo articolo e mi scuso se l’italiano, tradotto dal vietnamita con google translator, non è perfetto.

Click vào đây để đọc bằng tiếng việt!
If you are curious about this recipe of mine or Vietnamese food in general, write me a message. comment or go to the bottom of the site to read what other visitors have written.

Oggi, sabato, io e mio marito siamo andati a fare una passeggiata nei dintorni di Sestri, e poi ho pensato a cosa mangiare oggi a pranzo. Perché di solito nei fine settimana si mangia a casa solo una volta, il resto si mangia fuori.
Quindi al mercato settimanale ci siamo fermati a comprare alcune acciughe (sufficienti per una persona) da preparare.

Il mio pranzo di oggi comprende:
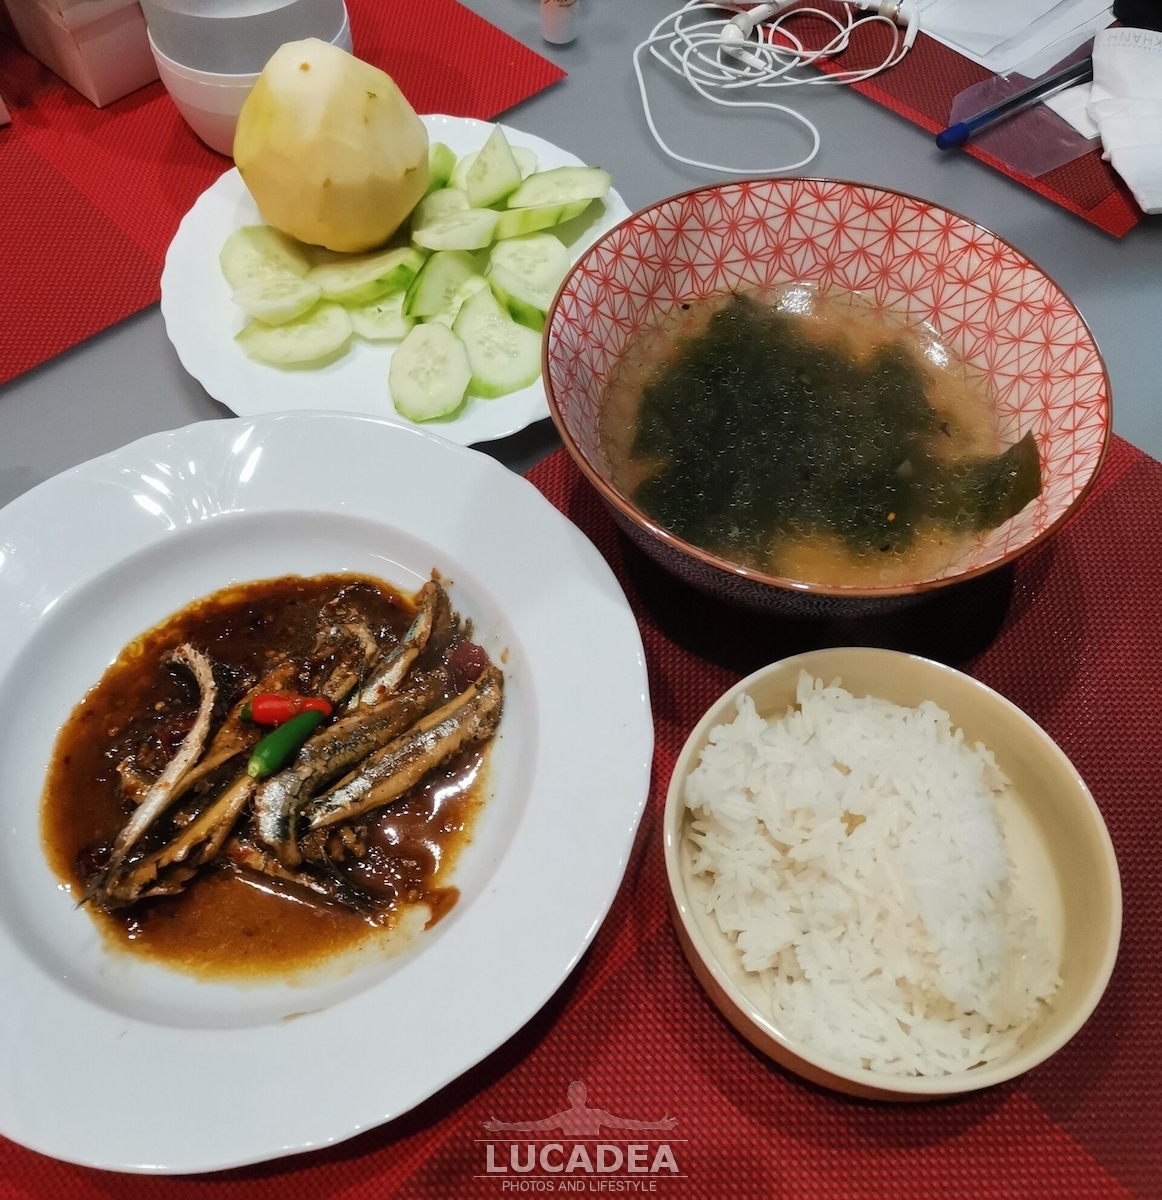
Acciughe brasate, salate e speziate servite con zuppa di cetrioli e alghe. Guarnire con 1 pera.

Gli ingredienti per una persona:
Un pugno di acciughe (8 pesci li ho pagati 1 euro);
Uno spicchio d’aglio;
Una cipolla;
Alcuni peperoncini freschi;
Un cucchiaino di peperoncino in polvere;
Un cucchiaio di salsa di pesce;
Un cucchiaino di salsa di soia;
Mezzo cucchiaino di zucchero;
Mezzo cucchiaino di condimento in polvere per il pesce e uno piccolo di glutammato (se non vuoi mangiare, non lasciarlo fuori);
Olio d’oliva EVO.

Come cucinare:
Tutte le spezie di cui sopra, le metti nel mortaio e le macini.
Mettere in padella dell’olio di oliva, attendere che si scaldi e mettere nella padella un cucchiaio di zucchero. Aspettare che lo zucchero si caramelli per creare colore, quindi aggiungere il pesce e friggere per circa cinque minuti. Quando vedete che il pesce è leggermente giallo, aggiungete il composto di spezie al pesce; ricordatevi di sciacquare il mortaio con due cucchiai d’acqua e quindi versatelo nella padella cuocendo a fuoco basso per dieci minuti. Assaggiate per vedere se dovete aggiungere spezie a seconda dei gusti.
Giratelo un paio di volte e poi puoi prendendolo aggiungete un po’ di pepe nero.

Questo pesce preparato così è perfetto per le tue giornate fredde e per le tue voglie di pesce.

Per la zuppa di alghe con gamberi secchi, gli ingredienti sono:

Foglie di alghe essiccate;
Gamberi essiccati (se non avete i gamberi secchi, usate i gamberi freschi);
Una piccola cipolla affettata;
Sale, condimento in polvere e salsa di pesce.

Come cucinare:
Immergete in acqua le alghe per farle ammorbidire.
Lavare e mettere a bagno i gamberi secchi.
Mettere in una pentola un filo di olio di oliva e far rosolare le cipolle fino a doratura, quindi aggiungere i gamberi secchi e far rosolare per due minuti.
Quindi aggiungere dell’acqua.
Quando l’acqua bolle, butta dentro le alghe, e lascia cuocere per altri 2 minuti e sarà pronta da gustare.

In un altro piatto ho tagliato un cetriolo da mangiare assieme al riso.

Come dessert una pera.

Ecco il mio delizioso pranzo:

Ricetta vietnamita: alici stufate e piccanti

Photo taken with Honor 20.

Hôm nay thứ 7, tôi và chồng đi dạo quanh Sestri, rồi tôi suy nghĩ trưa nay ăn gì? Vì thông thường cuối tuần, chúng tôi chỉ ăn nhà 1 buổi, còn lại thì ăn ngoài.
Nhân tiện chợ trời mở, tôi ghé qua mua 1 ít cá cơm đủ cho 1 người ăn để về làm món cá kho cay mặn.

Trưa nay bữa cơm của tôi gồm có:
Cá cơm kho cay mặn ăn kèm dưa leo và canh rong biển. Tráng miệng với 1 quả lê.

1/ Công thức cho món cá cơm kho cay mặn:
Cá cơm phần 1 người ăn (8 con giá 1 euro)
1 tép tỏi
1 tép hành củ
2 quả ớt tươi
1 muỗng cà phê ớt bột
1 muỗng nước mắm
1 muỗng cà phê nước tương
1/2 muỗng cà phê đường
1/2 muỗng hạt nêm và 1 ít bột ngọt (nếu bạn không muốn ăn không bỏ nhé)

Cách nấu:
Tất cả các gia vị trên, bạn bỏ vào cối và giã nhuyễn.
Bắt xoong lên cho dầu ăn vào, chờ nóng bạn bỏ vào chảo 1 muỗng đường. Ngào đường thành kẹo đắng để tạo màu, sau đó cho cá vào chiên sơ tầm 5 phút. Khi bạn thấy cá hơi vàng, thì cho hỗn hợp gia vị bên trên vào cá, nhớ tráng cối lại với 2 muỗng nước, rồi đổ vào xoong kho cá trên lửa riu riu trong 10 phút. Bạn kiểm tra lại gia vị vừa ăn hay chưa rồi gia giảm theo khẩu vị. Và chờ thêm 3-5 phút cho cá kho khô quẹo lại là có thể bắt ra, thêm ít tiêu đen và ăn cùng cơm.

Món cá kho mặn cay này, phù hợp cho những ngày se lạnh và thèm hải sản của mình ở Châu Âu này.

2/ Đối với canh rong biển nấu tôm khô, công thức khá đơn giản:

Lá rong biển khô
Tôm khô (nếu bạn không có tôm khô thì dùng tôm tươi)
Một củ nhỏ hành tím thái lát
Muối, bột nêm, nước mắm: nêm nếm vừa ăn.

Cách nấu:
Rong biển ngâm qua nước cho rã lá ra.
Tôm khô ngâm rửa sạch.
Cho xoong lên, bỏ vào một ít dầu ăn xào hành tím cho vàng, sau đó cho tôm khô vào xào thơm 2 phút.
Sau đó cho nước vào, vừa đủ ăn.
Nước sôi thì thả rong biển vào và nêm nếm gia vị vừa ăn, đợi thêm 2 phút là có thể nhấc ra thưởng thức rồi.

Cắt thêm 1 quả dưa leo nữa, thế là mình đã có đủ món cho bữa trưa hôm nay.

Vietnamese recipe: stewed and spicy anchovies – Recette vietnamienne : anchois mijotés et épicés – Receta vietnamita: anchoas guisadas y picantes – Receita vietnamita: anchovas cozidas e picantes – Vietnamesisches Rezept: gedünstete und würzige Sardellen – Cá cơm kho cay mặn ăn kèm dưa leo và canh rong biển – 越南菜谱:红烧凤尾鱼 – ベトナムのレシピ: アンチョビのスパイシー煮込み

Spaghetti con frutti di mare, la ricetta

Spaghetti con sugo di pomodorini, sgombro, pannocchie e gamberetti, la ricetta

Spaghetti con sugo di pomodorini, sgombro, pannocchie e gamberetti, la ricetta.
Dal momento che avevo in freezer degli avanzi avrei di pesce ho deciso di fare un bel sughetto con tutto quello che avevo e qualche pomodorino datterino.

Ingredienti (abbondante per due persone):

– un paio di filetti di sgombro
– una decina di pomodorini datterino
– qualche gamberetto
– un paio di cannocchie di mare
– olio evo
– aglio
– peperoncino
– sale
– spaghetti
– prezzemolo

Preparation:

Per prima cosa preparare il pesce; dal momento che era tutto surgelato la sera prima ho messo tutto in frigo per arrivare ad avere tutto pronto per il pranzo. E’ tutto molto semplice a parte le cannocchie che hanno una tecnica semplice per essere pulite (se cercate in rete ne troverete molti esempi).

Quindi cominciamo!
Mettiamo sul fuoco dell’acqua salata per cuocere gli spaghetti nel frattempo che prepariamo il sugo.
In una bella padella mettiamo abbondante olio, uno spicchio d’aglio schiacciato e il peperoncino.
Quando inizia a soffriggere aggiungiamo i pomodorini che in precedenza ho lavato a tagliato a metà.
Dopo qualche minto di cottura aggiungiamo un po’ di sale e togliamo l’aglio ed il peperoncino.
In questa preparazione ho ho aggiunto acqua o vino perché dai pomodorini esce acqua a sufficienza.
Dopo cinque minuti abbondanti di cottura aggiungiamo lo sgombro (spappolandolo con un mestolo); io lascio cuocere lo sgombro per 5 minuti ma forse si potrebbe fare in meno tempo.
Ora aggiungiamo i gambreretti e, dopo un paio di minuti, le cannocchie.
Due minuti e spegniamo.
Io non amo le bocce dei pomodorini per cui in questo momento le tolgo facendo attenzione a lasciarne la polpa, eventualmente ancora attaccata, nel sugo.
Se nel frattempo avete già buttato la pasta ora sarà quasi pronta; io la tiro su sempre un paio di minuti prima che sia pronta per ultimarne la cottura nella padella del sugo.
Infatti riaccendo il fuoco sotto la padella del sugo e vi ci metto gli spaghetti aggiungendo anche abbondante acqua di cottura della pasta.
Dopo due minuti esatti l’acqua è evaporata lasciando una densa e saporita cremina.
Ed ecco che è tutto pronto, spolverare con prezzemolo ed impiattare!

Ti piace questa ricetta? Aggiungi un comment or go to the bottom of the site to read what other visitors have written.

Eccovi il piatto finito:

Spaghetti con sugo di pomodorini, sgombro, pannocchie e gamberetti, la ricetta

Photo taken with Honor 20.

Spaghetti with tomato sauce, mackerel, corn on the cob and shrimp, the recipe – Spaghetti mit Tomatensauce, Makrele, Maiskolben und Garnelen, das Rezept – Mỳ Ý sốt cà chua, cá thu, bắp ngô và tôm, công thức

Sugo al nero di seppia, la ricetta

Sugo al nero di seppia

Sugo al nero di seppia, la ricetta.
Solo qualche anno fa ho assaggiato della pasta condita con il nero della seppia e devo dire che me ne sono innamorato.
Così, assieme all’aiuto di mia mamma (ottima cuoca), abbiamo provato a farlo a casa e devo dire che il risultato è stato molto buono.

Ingredients:
– un paio di seppie intere
– cipolla
– aglio
– olio
– vino bianco
– sale
– passata di pomodoro

Preparation:
Si prendono le seppie pulite (operazione che quasi sempre il pescivendolo può fare per voi facendo attenzione a conservare la piccola sacca contenente il nero che ci servirà quasi all’ultimo della preparazione) e si tagliano a striscione e pezzetti.
A parte, in una padella si fanno soffriggere, in olio di oliva, la cipolla e l’aglio sminuzzati.
Quando il soffritto è ben dorato si aggiungono le striscione di seppia e, dopo averle saltate qualche secondo, si sfuma col vino bianco.
Velocemente l’alcol presente nel vino evaporerà e quindi si aggiunge la passata di pomodoro ed un pizzico di sale.
Si fa cuocere per una quindicina di minuti mescolando di tanto in tanto.
A questo punto, e solo pochissimi minuti prima che la pasta sia cotta, si aggiunge il nero incidendo le piccole sacche precedentemente lasciate da parte e mescolandole con il resto del pomodoro.

A questo punto basta aggiungere la pasta in padella e saltarla per poter gustare questo sugo!

Attenzione: il nero macchia tutto! Vi consiglio di appoggiare le due sacche direttamente nella padella ed inciderle lì per evitare un pasticcio.

Ti piace questo tipo di sugo? Aggiungi un tuo comment or go to the bottom of the site to read what other visitors have written.

Questa è una bella foto del sugo:

Sugo al nero di seppia

Photo taken with Canon EOS M100 and lens Canon EF-M 22.

The recipe for pasta with cuttlefish ink sauce – La recette des pâtes sauce à l’encre de seiche – La receta de pasta con salsa de tinta de sepia – A receita de macarrão com molho de tinta de choco – Das Rezept für Nudeln mit Tintenfischsauce – Công thức món mì Ý sốt mực – 墨鱼墨汁意大利面食谱 – イカ墨ソースのパスタ レシピ・作り方

Prepare the garlic sauté in a pan

Soffritto di aglio in padella

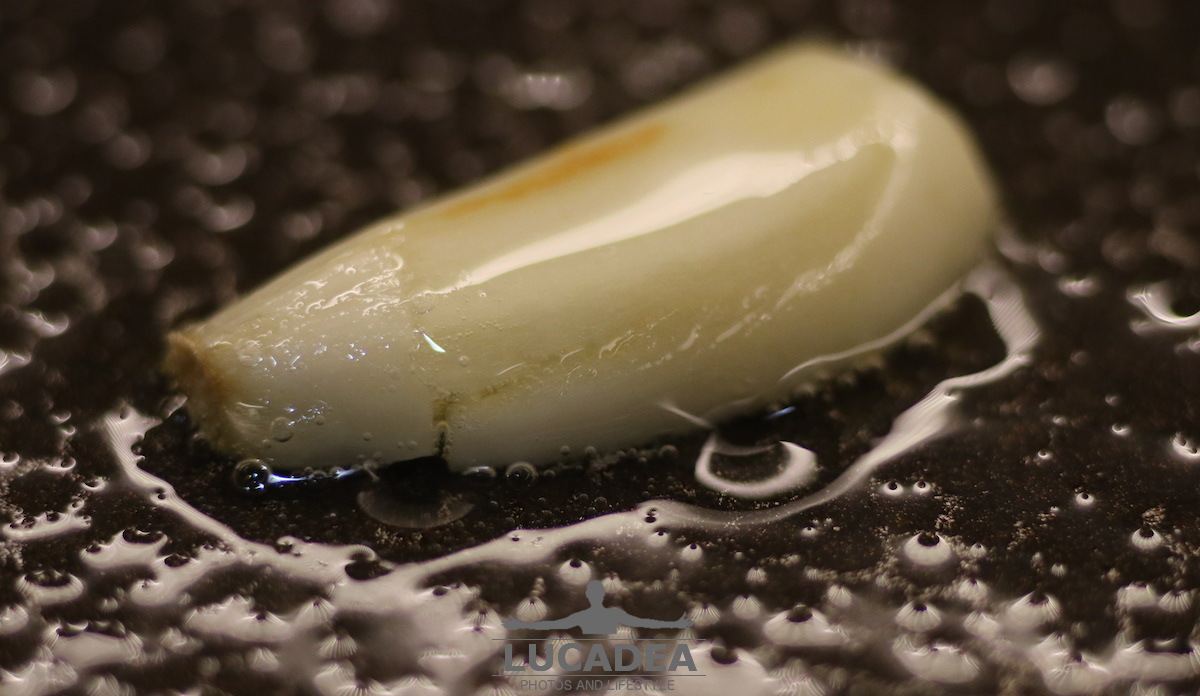
Prepare the garlic soffritto in a pan.
In many Italian culinary preparations (but not only) we start from here.
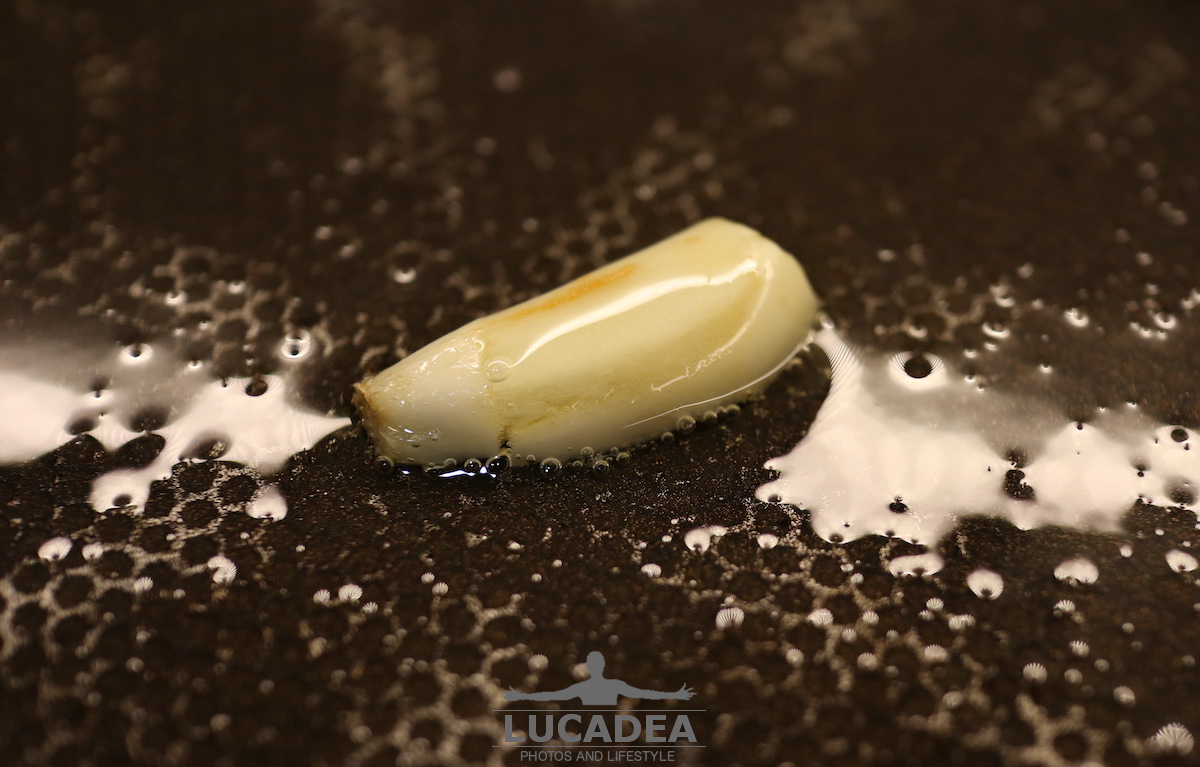
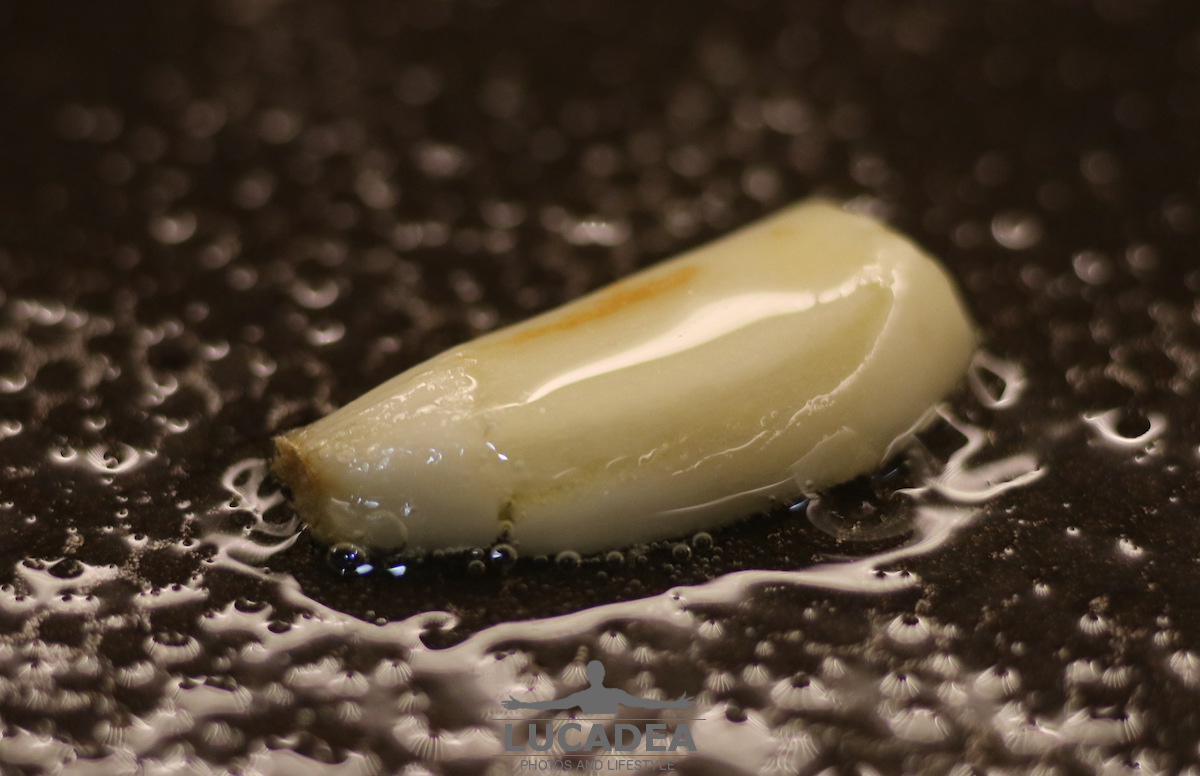
In this case the preparation was functional to the preparation of a dish of pasta aglio e olio whose two main ingredients you can see here in the photo.
Leave the garlic to fry lightly for a couple of minutes and that's it. I could probably cut it a little finer but leaving it like this, just a little crushed, I can then remove it from the finished dish.
Just be careful not to burn it otherwise it will no longer be good (and probably also bad for your health).

Do you use garlic a lot in cooking?
Add your own comment or go to the bottom of the site to read what other visitors have written.

Soffritto di aglio in padella

Soffritto di aglio in padella

Soffritto di aglio in padella

Photo taken with Canon EOS M100 and lens Tamron SP AF 90mm.

Obviously there are many sites online that explain how to make the perfect soffritto: finedininglovers.it or scattigolosi.com or even the classic giallozafferano.it.

Prepare the garlic sauté in a pan – Préparer l’ail sauté dans une poêle – Preparar los ajos salteados en una sartén. – Prepare o alho salteado em uma panela – Bereiten Sie den sautierten Knoblauch in einer Pfanne vor – Chuẩn bị tỏi xào trong chảo

Pasta aglio e olio preparata a casa

Pasta aglio e olio

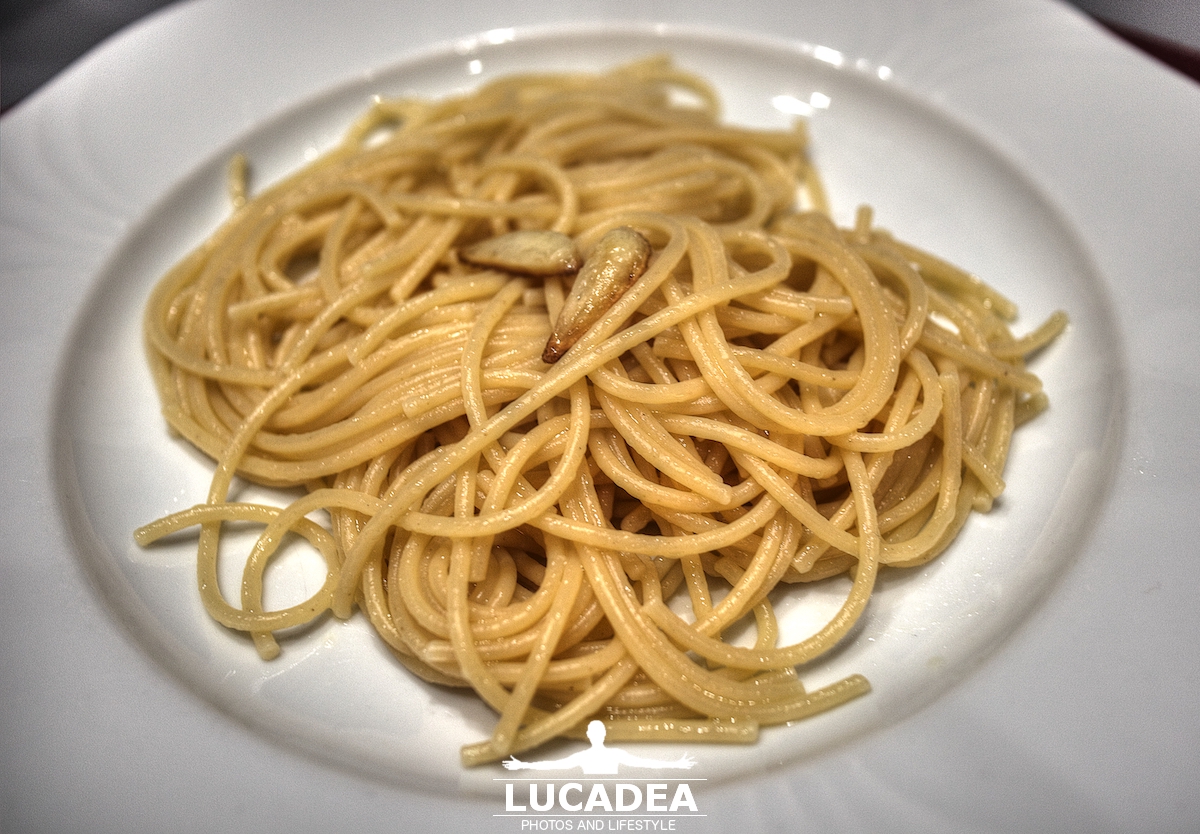
Pasta aglio e olio preparata a casa.
Da poco tempo questo tipo di pasta, tra le più semplici da preparare, è diventata una delle mie preferite.
Anche se la più classica è con l’aggiunta di peperoncino io la preferisco così, non piccante (anche se un pochino “hot” la sopporto), anche perché a casa non ho peperoncini…
Devo ammettere poi, e i veri amanti di questa preparazione mi odieranno, che ho aggiunto un poco di formaggio grattugiato alla fine che però ho evitato di mettere nella foto.
Altri ingredienti che normalmente si mettono sono prezzemolo e acciuga che però io non amo né, in questo momento, ho in casa!
A voi piace? Piccante oppure no? Con formaggio grattugiato oppure no?
Scrivetemelo lei commenti cliccando here!

Pasta aglio e olio

Pasta aglio e olio

Photo taken with Canon EOS M100 and lens Canon EF-M 22.

Gli spaghetti aglio e olio (spaghetti aglio e uoglie) sono un piatto tipico della cucina napoletana, facente parte della schiera di ricette cosiddette della cucina piccina partenopea.
Continue and learn more on Wikipedia.

Gamberi con aglio ai Caraibi

Gamberi con aglio ai Caraibi

Gamberi con aglio ai Caraibi.
Non e’ sempre facile trovare cibi da fotografare specialmente quando l’ingrediente principale e’ sempre lo stesso: il gambero.
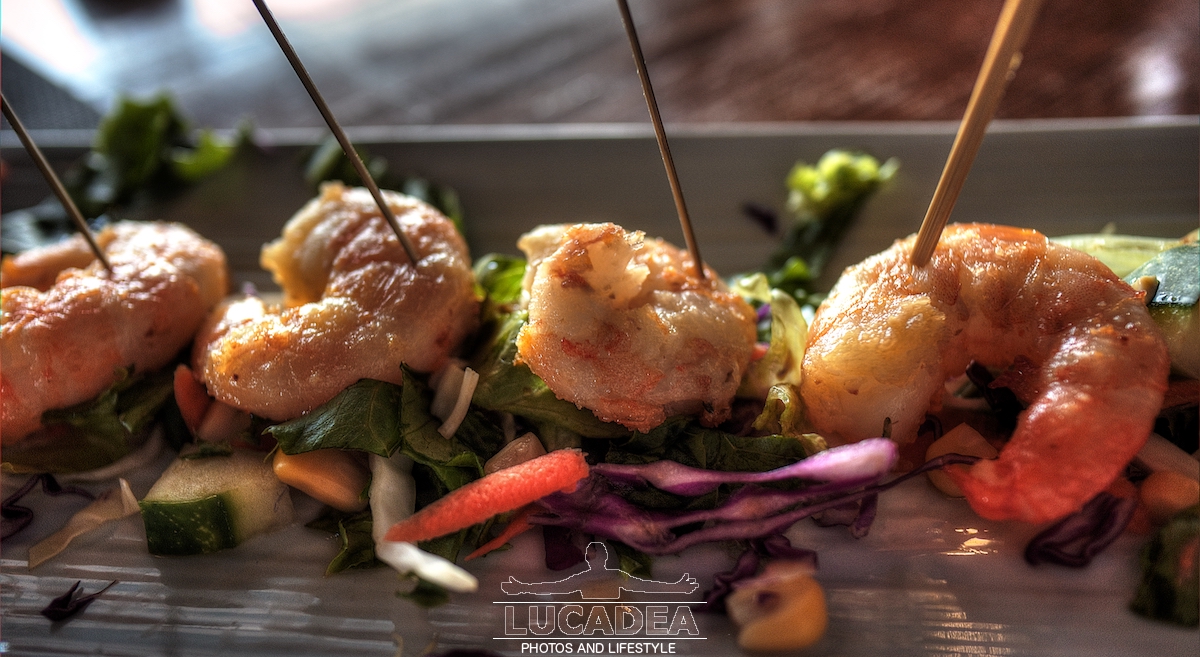
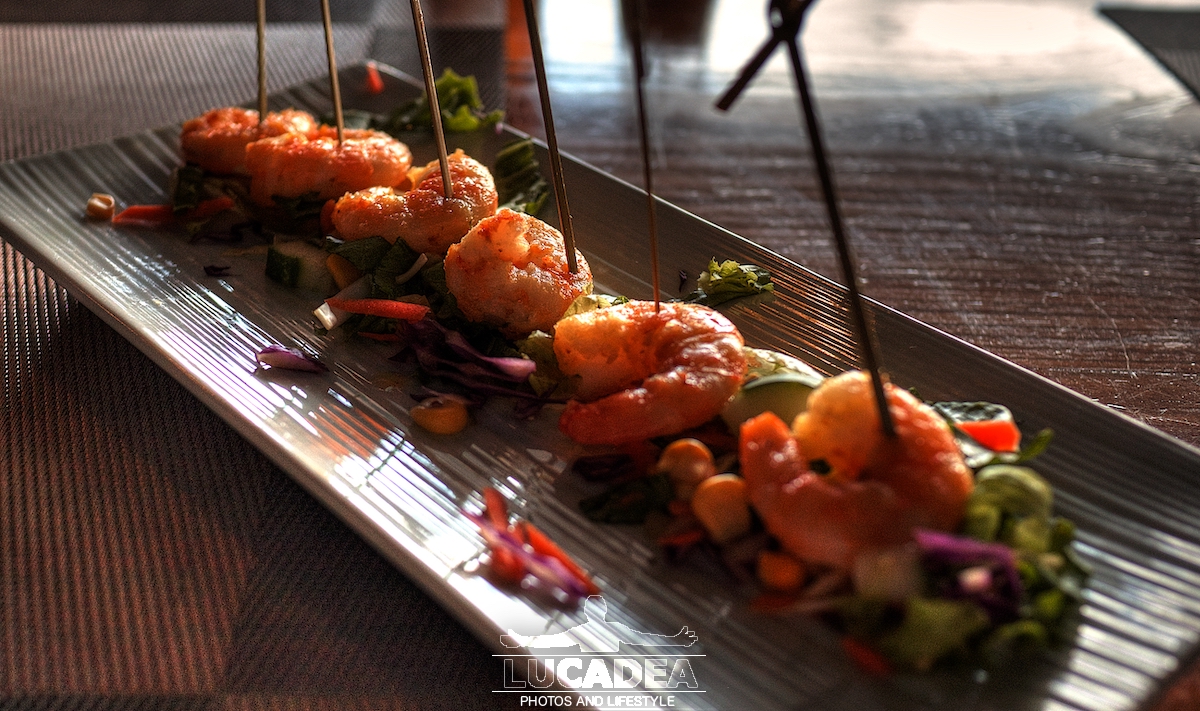
Questo piatto, gustato in quel di barbados, era un pochino insolito (non il solito gambero al cocco) per questa ragione sono contento di averlo immortalato!
Anche il piatto era ben imbastito con una bella decorazione floreale.
Il gusto non era un granche’: i gamberi piccoli piccoli e troppo aglio…

Gamberi con aglio ai Caraibi

Gamberi con aglio ai Caraibi

Photo taken with Canon EOS M100 and lens Canon EF-M 22.

Il nome volgare gambero identifica varie specie di crostacei acquatici appartenenti prevalentemente all’ordine dei Decapodi (Astacidea, Penaeoidea, Caridea ecc.) e marginalmente agli ordini degli Euphausiacea (krill), degli Stomatopoda (canocchie), dei Mysida e degli Amphipoda.
Continue and learn more on Wikipedia.