Galician scallops, the recipe. Some time ago I went to lunch in the covered market of Tenerife (first time in my life) and I tasted this dish for the first time. They are scallops au gratin and, online, I discovered that there is a Galician recipe, which I will now describe to you.
Ingredients:
– 1 clove garlic; – 1 large onion; – 1/2 cup white wine; – 1 tablespoon chopped parsley; – 2 tablespoons breadcrumbs; – 1 tablespoon sweet smoked paprika – 5 tablespoons olive oil; – Salt and pepper.
Preparation:
First make sure the scallops are clean and free of any debris. If the scallops are still attached to the shell, gently separate them. Remove any membranes or inedible parts. Then sauté with oil, garlic and chopped onions; when it starts to wilt add the paprika and white wine. Season with salt and pepper, and cook for a minute. Pour the sauce over the scallops (directly in the shells) and sprinkle them with plenty of breadcrumbs; now put them in the oven, turning on only the grill. When you see that the surface begins to brown, they are ready; you can remove them from the oven and add a drizzle of dolia oil and parsley (which I don't like so I don't add it).
Have you ever tasted them? Add a comment or go to the bottom of the site to read what other visitors have written.
For the recipe I took inspiration from the site: spain.info.
Scallops au gratin or Galician style, the recipe – Coquilles Saint-Jacques gratinées ou à la galicienne, la recette – Vieiras gratinadas o a la gallega, la receta – Vieiras gratinadas ou à galega, a receita – Công thức làm món sò điệp au gratin hoặc kiểu Galicia – 烤扇贝或加利西亚风格,食谱 – ホタテ貝のグラタンまたはガリシア風、レシピ
Every now and then, when I'm on a ship, someone asks the chef to prepare a proper pasta e fagioli. We are almost always satisfied. So I decided to write down the recipe (with a little help). The photo is of a finished dish enjoyed on the ship.
Ingredients:
– 250 g pasta (usually short pasta, such as ditalini or tubetti, or even long broken pasta); – 400 g cannellini beans (you can use canned or dried ones, previously soaked and cooked); – 1 onion, finely chopped; – 2 cloves garlic, minced; – 2 carrots, diced; – 2 celery stalks, diced; – 400 g peeled tomatoes, chopped; – 1 litre vegetable or meat broth; – 2 bay leaves; – 1 sprig rosemary; – Extra virgin olive oil; – Salt and black pepper to taste; – Grated Parmesan cheese (optional, for serving);
Preparation:
In a large saucepan, heat a little olive oil over medium heat. Add the onion, garlic, carrots and celery. Sauté until the vegetables are tender. Add the chopped peeled tomatoes and cook for a few minutes until the mixture thickens. Add the cannellini beans and mix well with the vegetables and tomatoes. Pour the stock into the saucepan and add the bay leaves and sprig of rosemary. Bring to a boil, then reduce the heat and simmer for about 20-30 minutes. Meanwhile, cook the pasta in salted water according to the package instructions, but leave it al dente. Drain the pasta and add it to the saucepan with the bean soup. Mix well. Taste the soup and season with salt and pepper to taste. Remove the bay leaves and the sprig of rosemary. Serve the pasta e fagioli hot, garnished with a drizzle of extra virgin olive oil and, if desired, a sprinkling of grated parmesan. This recipe is just a basic guide, and you can adapt it according to your personal tastes. Enjoy!
How do you prepare it? Add a comment or go to the bottom of the site to read what other visitors have written.
Pasta e fagioli is a typical Italian dish of which there are several regional variations. In Neapolitan cuisine, pasta is cooked directly together with legumes. Thanks to this particular cooking system, the starch present in the pasta is preserved. This gives the preparation a particularly creamy appearance that in Neapolitan is called (“azzeccosa”). Continue and learn more on Wikipedia
A classic pasta and beans, the recipe – Un classique des pâtes et des haricots, la recette – Un clásico de pasta y frijoles, la receta – Um clássico macarrão com feijão, a receita – Ein Klassiker aus Pasta und Bohnen, das Rezept – Một công thức mì ống và đậu cổ điển – 经典的面食和豆类,食谱 – 定番のパスタと豆のレシピ
The text of the post was written with the help of ChatGPT, a language model from OpenAI.
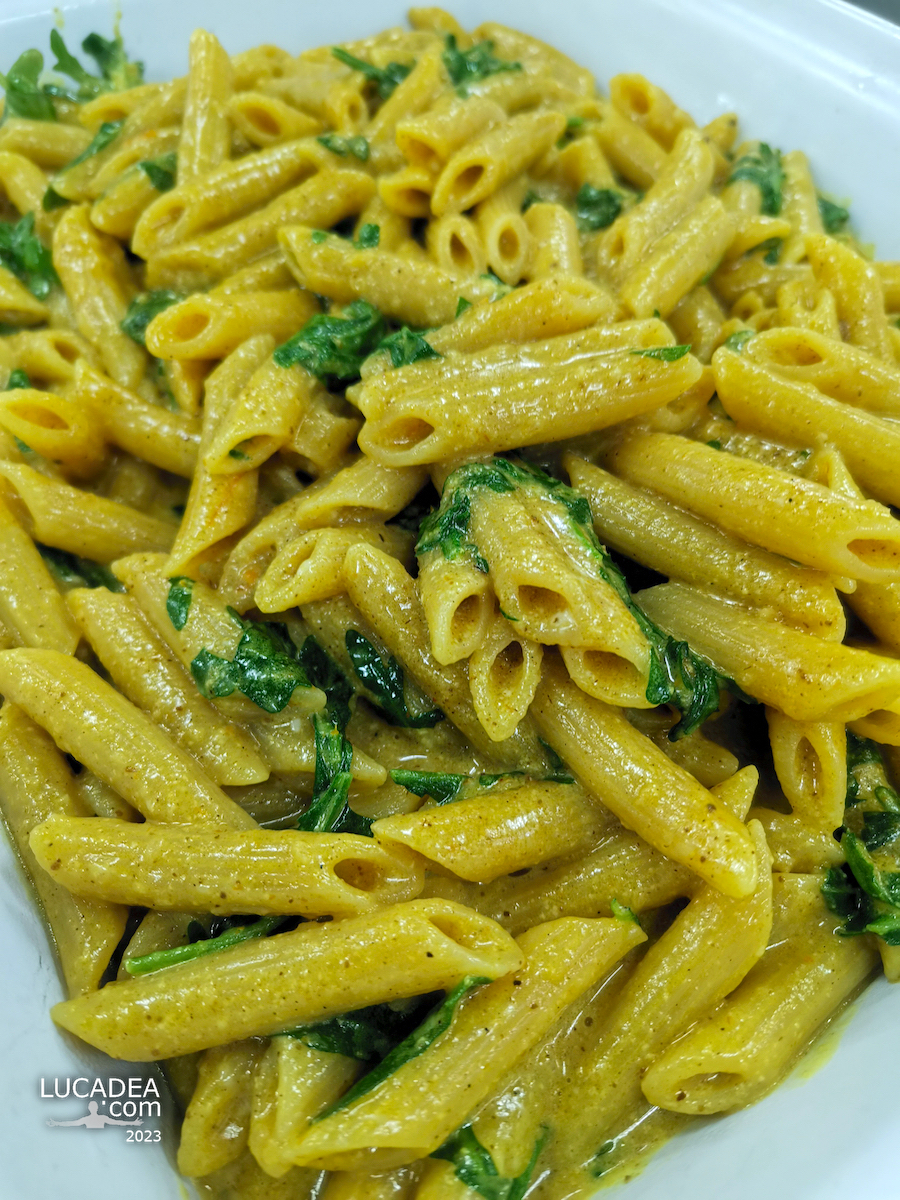
Penne with curry and rocket, the recipe. Some time ago, the chef on board prepared us an Indian dish with strong flavors: penne seasoned with curry and rocket. Obviously a dish of Indian origin.
Ingredients
350 g of penne;
1 tablespoon olive oil;
1 onion, finely chopped;
2 cloves garlic, minced;
1 teaspoon curry powder;
200 ml cooking cream;
Salt and pepper to taste;
100 g of fresh rocket;
Grated Parmesan cheese (optional).
Preparation
Cook the penne: Bring a pot of salted water to a boil and cook the penne according to the package instructions. Drain when al dente. Make the curry sauce: In a large skillet, heat the olive oil over medium heat. Add the chopped onion and garlic and sauté until translucent. Add the curry: Add the curry powder to the onion and stir well to combine. Pour in the cream: Pour the cream into the skillet and stir well. Cook over medium-low heat for about 5-7 minutes or until the sauce thickens slightly. Be sure to stir occasionally. Season with salt and pepper: Add salt and pepper to taste to adjust the flavor of the sauce. Combine the penne and arugula: Add the cooked penne to the skillet with the curry sauce. Also add the fresh arugula and mix well until the arugula is slightly wilted. Serve: Divide the curry and arugula penne among the plates. If desired, sprinkle with grated parmesan. Garnish and serve: You can garnish with a little freshly ground black pepper or other cheese to your liking. Serve hot and enjoy your delicious curry and arugula pasta! This recipe is quite flexible, so feel free to adapt it to your personal tastes. Enjoy!
Do you like curry? Add your own comment or go to the bottom of the site to read what other visitors have written.
Pasta seasoned with curry and rocket, the recipe – Pâtes assaisonnées au curry et roquette, la recette – Pasta aliñada con curry y rúcula, la receta – Macarrão temperado com curry e rúcula, a receita – Mit Curry und Rucola gewürzte Pasta, das Rezept – Công thức mì ống với cà ri và tên lửa – 用咖喱和火箭调味的意大利面,食谱 – カレーとルッコラのパスタ、レシピ
The text of the post was written with the help of ChatGPT, a language model from OpenAI.
Homemade Greek gyros, the recipe. One of the dishes that I have started to like a lot in recent years is Greek gyros (the pork one). Since Greek restaurants are not so common in my area (even though there has been one in Chiavari for a long time) I decided to try making it at home. The result, still a little far from the classic, was not bad anyway. I'll tell you right away: don't criticize me too much but suggest how to improve the dish.
Ingredients
For the meat: – 500 grams of pork (for example, pork loin or shoulder); – 2 teaspoons of dried oregano (for the spices I opted to buy a ready-made package on Amazon); – 2 teaspoons of sweet paprika; – 2 teaspoons of ground cumin; – 3 cloves of garlic, minced; – Juice of 1 lemon; – Salt and black pepper to taste; – 2 tablespoons of olive oil.
As a side dish: – 4 Greek pitas or round rolls (I bought tigelle); – Tzatziki sauce (see recipe below); – Thinly sliced red onions.
For the tzatziki sauce: – 1 cucumber, peeled, seeded and grated; – 250 grams Greek yogurt; – 2 cloves garlic, finely chopped; – 2 tablespoons olive oil; – 1 tablespoon white wine vinegar; – 1 tablespoon chopped fresh mint; – Salt and black pepper to taste;
Preparation
Start by making the marinade for the meat. In a bowl, mix together the oregano, paprika, cumin, minced garlic, lemon juice, salt, pepper and olive oil. Add the pork cut into thin strips and make sure it is well coated with the marinade. Cover the bowl and let it marinate in the refrigerator for at least 30 minutes, but preferably for several hours or overnight. In the meantime, make the tzatziki sauce. Grate the cucumber and squeeze out the excess water. In a bowl, mix together the grated cucumber, Greek yogurt, minced garlic, olive oil, white wine vinegar, mint, salt and pepper. Refrigerate the tzatziki sauce until ready to serve. Preheat a grill or nonstick skillet over medium-high heat. Cook the marinated pork strips until they are cooked through and have developed a nice golden color, about 4-5 minutes per side. Heat the Greek pitas or round sandwiches in a skillet or on the grill until they are lightly browned.
To serve, place the grilled pork, bread and a few strips of red onion on a plate. On the side, the tzatziki sauce. Complete if you want (but I didn't put them because I don't like them) with tomato slices, lettuce leaves and, if you want, green peppers or jalapeños.
This is your delicious Greek pork gyros! Enjoy! Add your own comment or go to the bottom of the site to read what other visitors have written.
Homemade Greek gyros, the recipe – Gyros grecs maison, la recette – Gyros griegos caseros, la receta – Giroscópios gregos caseiros, a receita – Hausgemachtes griechisches Gyros, das Rezept – Con quay Hy Lạp tự làm, công thức – 自制希腊陀螺仪,食谱 – 自家製ギリシャのジャイロ、レシピ
The text of the post was written with the help of ChatGPT, a language model from OpenAI.
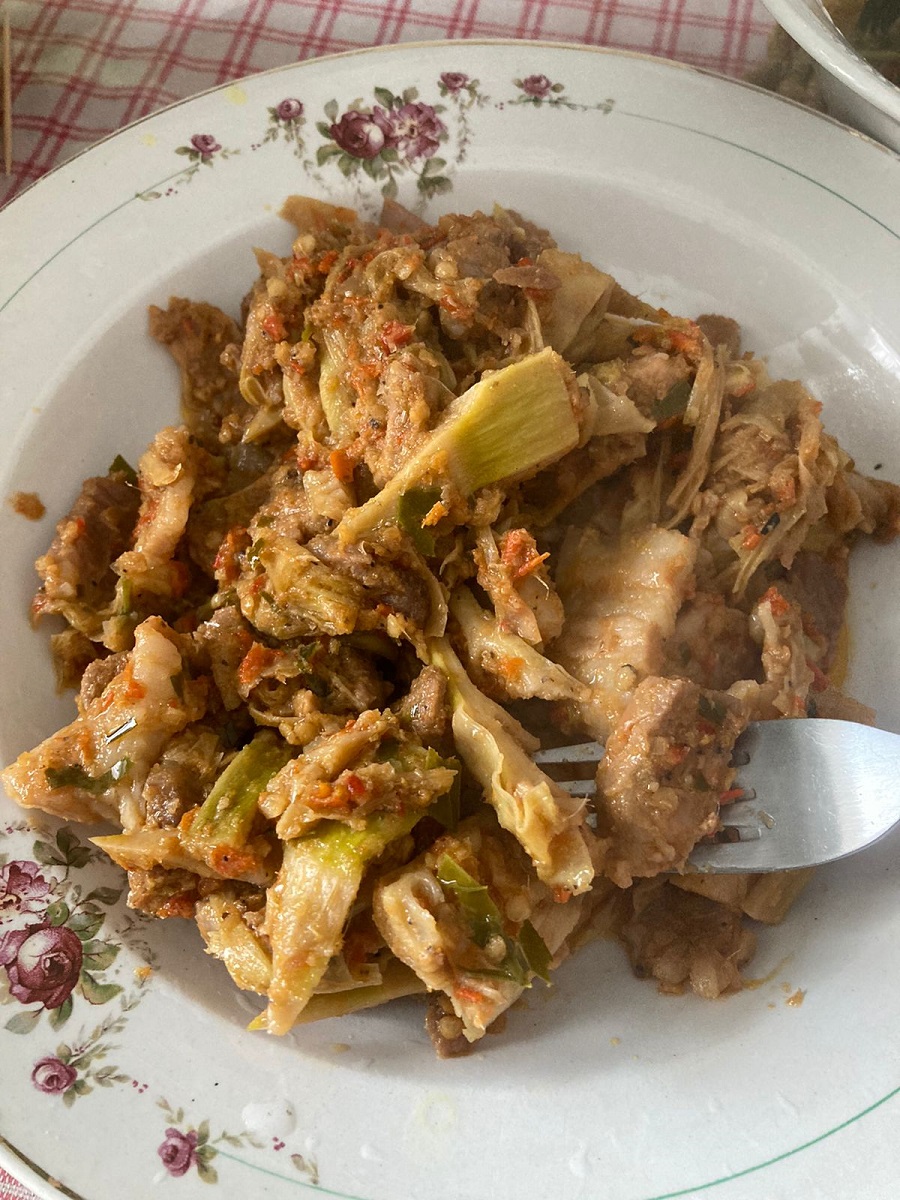
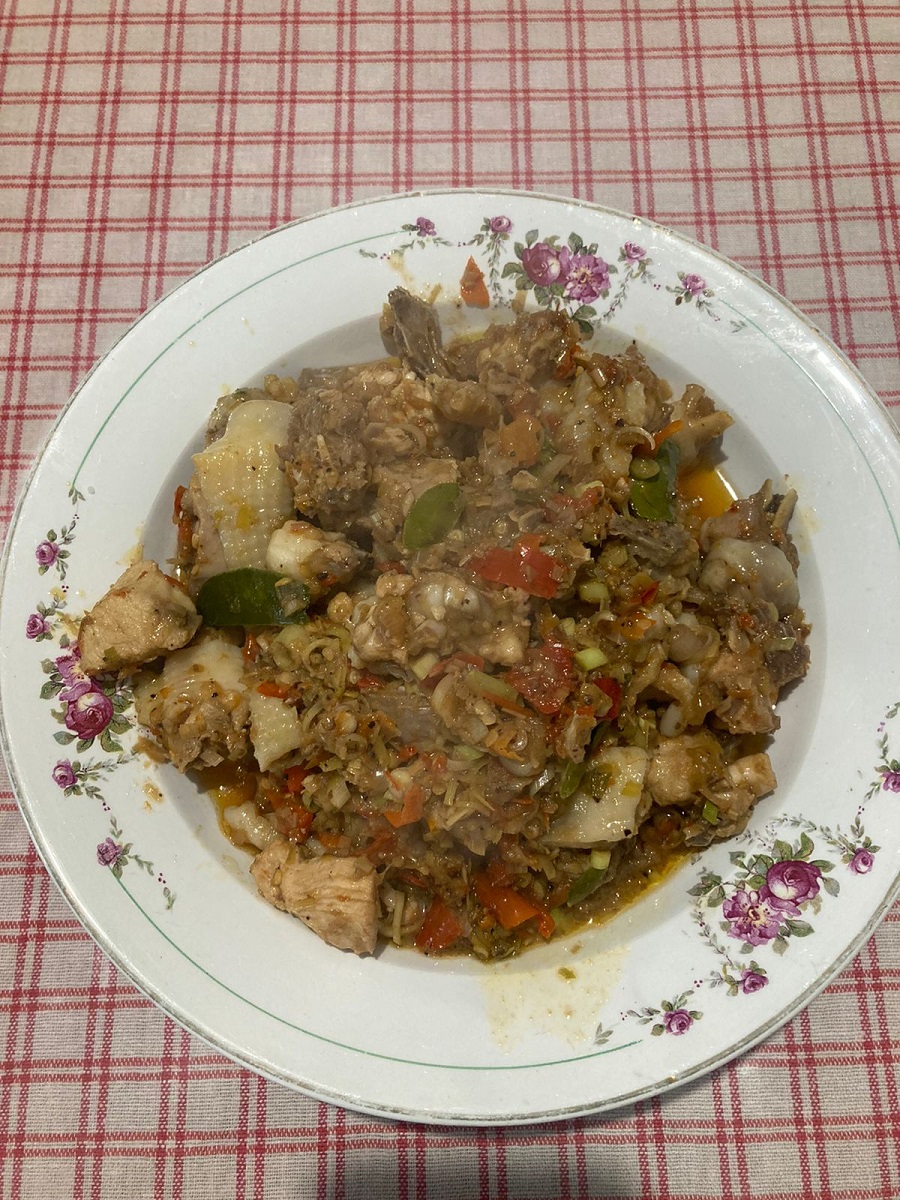
Thai Cuisine: Stir-fried Pork Belly with Bamboo Shoots, the recipe.
Today I am going to tell you about the recipe of Miss Sao, my friend, who comes from the south of Thailand and precisely near Phuket. Her dishes are very spicy but extremely tasty and delicious. I really like how she prepares Thai food.
Click vào đây để đọc bằng tiếng việt! If you are curious about this recipe of mine or Vietnamese food in general, write me a message. comment or go to the bottom of the site to read what other visitors have written.
Ingredients
– 100 grams young bamboo shoots, chopped; – 170 grams thick pork belly (not the breakfast kind, so to speak), chopped; – 4 lemongrass stalks, finely chopped; – 12 chili peppers, finely chopped; – 4 shallots: finely chopped; – 5 garlic cloves: finely chopped; – 1 small turmeric: finely chopped; – Lemon leaves, core removed and chopped; – Olive oil; – Fish sauce, shrimp paste, monosodium glutamate, seasoning powder, sugar, pepper.
Preparation
First combine the shallot, garlic, lemongrass, chilli and turmeric in a blender (or if you have time and energy in a moratio) until you get a puree. Put the oil in a saucepan and then add the blended mixture on top and fry it until it becomes golden and fragrant (this takes about 4-6 minutes).
Then continue to add 1/2 tablespoon of shrimp paste and mix evenly and then add the bacon, it takes about ten minutes until the meat is almost cooked, then add 1/2 teaspoon of MSG, 1/3 teaspoon of seasoning powder and mix some more.
Now add the bamboo shoots and stir by hand. Since there is water in the bamboo shoots, which is released during cooking, there is no need to add water. Stir-fry for 5-8 minutes, check if the seasoning is right, and add a little fish sauce and sugar (depending on your taste) to suit your home taste. At the same time, add chopped lemon leaves on top.
Continue to simmer for another 5 minutes to complete the dish. Pour into a dish and sprinkle with a pinch of pepper.
The dish is ready and this is how it should look:
Thịt ba chỉ xào măng, món Thái (stir-fried pork belly with bamboo shoot, Thailand food Nguyên liệu * 100 gram măng non (bamboo shoot), thái thành khúc * 170 gram thịt ba chỉ (pork belly), thái thành khúc * 4 nhánh sả, thái nhỏ * 12 quả ớt, thái nhỏ * 4 củ hành tím nhỏ: thái nhỏ * 5 củ tỏi: thái nhỏ * 1 củ nghệ nhỏ: thái nhỏ * Lá chanh, bỏ chỉ, thái sợi. * Nước mắm, mắm tôm (shrimp paste), bột ngọt, bột nêm, đường, hạt tiêu. Cách làm Đầu tiên, cho toàn bộ hành, tỏi, sả, ớt, nghệ đã thái nhỏ vào xay nhuyễn.
Cho dầu ăn vào xoong, sau đó cho hỗn hợp đã xay nhuyễn ở trên vào xào đều, cho vàng và thơm trong khoảng 4-6 phút.
Sau đó tiếp tục cho 1/2 muỗng canh mắm tôm vào xào đều và cho tiếp thịt ba chỉ vào, xào thịt ba chì trong 7 phút cho thịt gần chín thì cho vào 1/2 muỗng cà phê bột ngọt, 1/3 muỗng bột nêm (seasoning). Đảo thêm tí nữa, rồi tiếp tục cho măng đã chuẩn bị phía trên vào. Xào đều tay. Vì trong măng có nước nên không cần cho nước vào. Xào trong 5-8 phút, kiểm tra gia vị lại đã vừa ăn hay chưa, rồi nêm thêm một ít nước mắm và đường(tuỳ vào gia đình bạn) cho phù hợp với khẩu vị gia đình bạn. Đồng thời cho lá chanh đã thái nhỏ ở trên. Tiếp tục để lửa riu riu trong 5 phút nữa là hoàn thành món ăn. Cho ra đĩa và rắc thêm tiêu. Cô Sao- bạn tôi, là người sống ở miền nam Thái Lan phuket. Các món ăn của cô rất là cay nhưng cực kì đậm vị và ngon miệng. Tôi rất thích đồ ăn Thái của cô chuẩn bị.
Thai Recipe: Stir-fried Pork Belly with Bamboo Shoots – Recette Thaï : Poitrine de porc sautée aux pousses de bambou – Receta tailandesa: panceta de cerdo salteada con brotes de bambú – Receita tailandesa: barriga de porco frita com brotos de bambu – Thailändisches Rezept: Gebratener Schweinebauch mit Bambussprossen – Công thức món Thái: Thịt ba chỉ xào măng – 泰式食谱:竹笋炒五花肉 – タイのレシピ:タケノコと豚バラ肉の炒め物
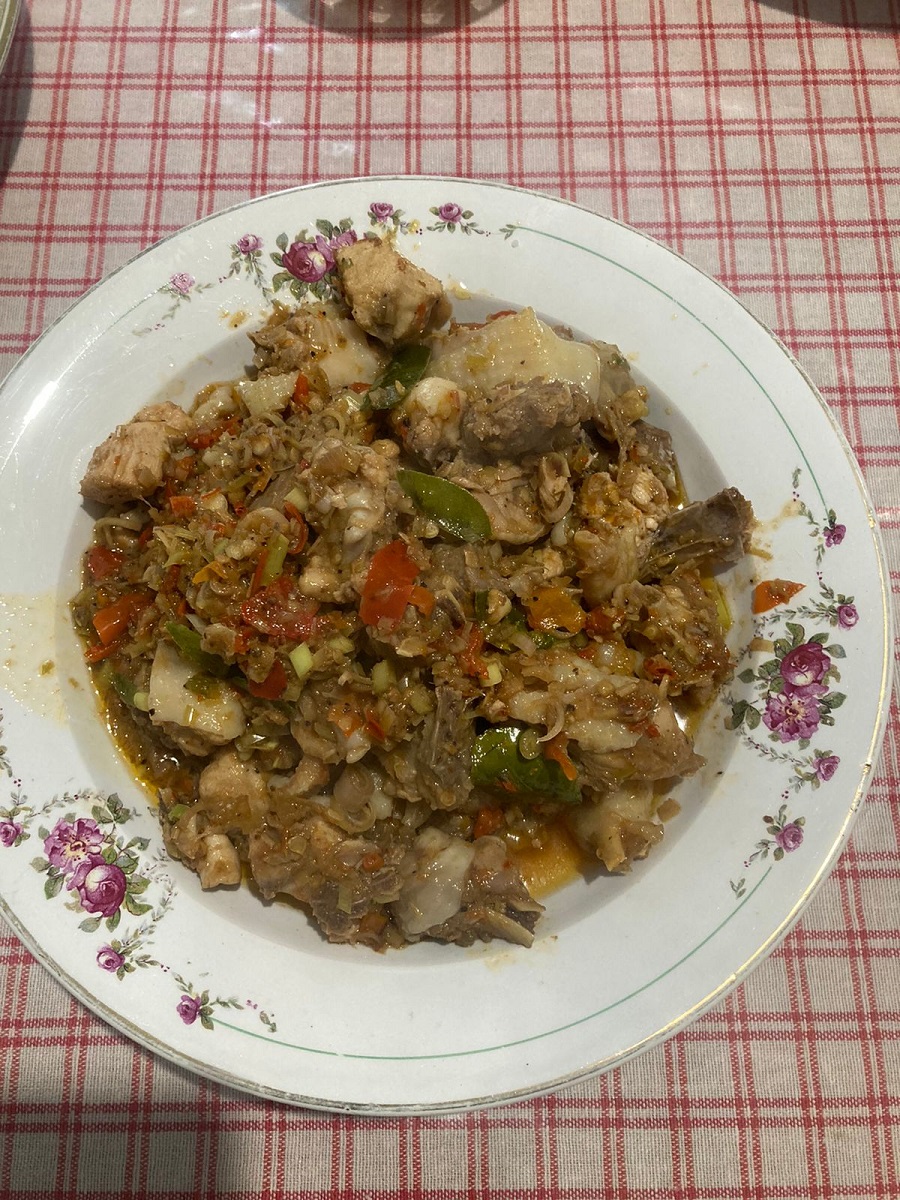
Thai Cuisine: Stir-fried Chicken with Lemongrass and Chilli and Lemon Leaf, the recipe.
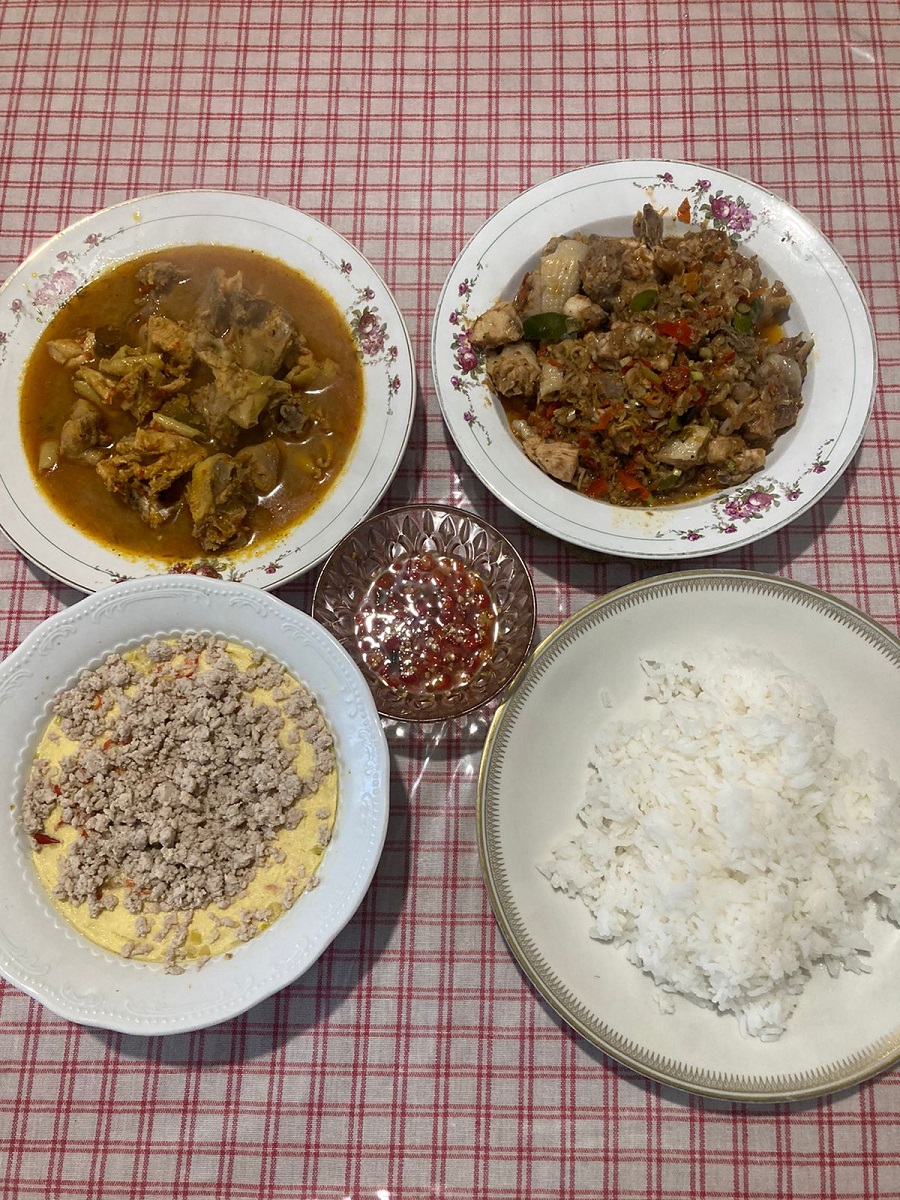
This is a dish my friend Sao and I ate together, she cooked it Thai style and therefore made it quite spicy and salty. I hope you like this dish too and can follow the instructions to make it at home. The meal consisted of chicken curry (which I wrote you the ricetta), stir-fried chicken, Mắm chưng (Vietnamese meatloaf which I will tell you about another time) and rice.
Click vào đây để đọc bằng tiếng việt! If you are curious about this recipe of mine or Vietnamese food in general, write me a message. comment or go to the bottom of the site to read what other visitors have written.
Ingredients
– 1/2 chicken (we bought chicken because Asians like to eat rather tough meat but you can use a more common chicken if you want); – 5 stalks of lemongrass, finely chopped; – 7 chili peppers, finely chopped; – Onions, garlic: finely chopped; – Lemon leaves; – Olive oil; – Fish sauce, monosodium glutamate, seasoning powder, sugar and pepper.
Preparation
The hen is very tough, so after washing it, boil it for 30-45 minutes until the meat is softer, then cut it into bite-sized pieces and marinate some seasonings: 1 tablespoon of fish sauce, a little pepper, a little chopped lemongrass, chopped onion and garlic. Marinate for 20 minutes.
Next, put 3 tablespoons of olive oil in the pan, heat the oil and fry some onion and garlic.
Then add the lemongrass and chili to stir fry until fragrant. Then add the chicken and stir fry until the meat is firm and browned, then add the seasoning: 2 tablespoons of fish sauce, 1/3 teaspoon of seasoning, 1/2 teaspoon of MSG, 1/2 teaspoon of sugar and add a little water. Continue to cook on low heat until the chicken is the consistency you like.
When the chicken pieces are ready, remove them from the pan and drain them and sauté them in a pan for 1-2 minutes, adding the lemon leaves and a little pepper to make it fragrant.
At this point the chicken, sautéed with lemongrass and chilli pepper is ready to be served and, above all, enjoyed!
Nguyên liệu * 1 con gà Galina chia ra: 1/2 làm cà ri gà, 1/2 làm gà xào sả ớt lá chanh (có thể dùng loại gà khác, vì người Châu Á thích ăn gà dai nên chúng tôi mua gà Galina) * 5 nhánh sả, thái nhỏ * 7 quả ớt, thái nhỏ * Hành, tỏi: thái nhỏ * Lá chanh * Nước mắm, bột ngọt, bột nêm, đường, hạt tiêu. Cách làm Gà galina rất dai nên sau khi rửa sạch thì mang đi luộc trong 30-45 phút cho thịt mềm ra, sau đó chặt thành miếng vừa ăn và ướp một ít gia vị: 1 muỗng canh nước mắm, một ít hạt tiêu, một ít sả băm sẵn, hành và tỏi băm sẵn (đã chuẩn bị phía trên). Ướp trong 20 phút. Tiếp theo, cho 3 muỗng canh dầu ăn vào chảo, làm nóng dầu thì phi thơm hành, tỏi, sau đó cho tiếp sả và ớt vào xào chung cho thơm. Tiếp đó cho thịt gà vào xào cùng cho đến khi thấy thịt săn lại thì cho gia vị: 2 muỗng canh nước mắm, 1/3 muỗng cà phê hạt nêm, 1/2 muỗng cà phê bột ngọt, 1/2 muỗng cà phê đường và thêm chút nước. Đảo đều thịt gà cho đến khi chín thì nêm nếm lại cho vừa khẩu vị. (Gia vị phí trên là nấu cho ít hơn 1/2 phần con gà galina) Tiếp tục đun trên lửa nhỏ liu riu cho đến khi thịt gà chín thơm lừng và cạn bớt nước thì tiếp tục cho lá chanh vào, xào thêm 1-2 phút là có thể tắt bếp, cho thêm ít hạt tiêu vào cho thơm. Trút gà xào sả ớt ra đĩa và thưởng thức. Bữa cơm này tôi và cô Sau ăn cùng, cô nấu theo phong cách Thái lan nên cô làm khá là cay và mặn mà. Tôi hi vọng bạn cũng thích món này và có thể làm theo như hướng dẫn trên.
Thai recipe: chicken stir-fried with lemongrass and chillies and lemon leaf – Recette thaïlandaise : poulet sauté à la citronnelle et piments et feuille de citronnier – Receta tailandesa: pollo salteado con hierba de limón y guindillas y hoja de limón – Receita tailandesa: frango frito com capim-limão e pimenta e folha de limão – Thailändisches Rezept: Gebratenes Hähnchen mit Zitronengras und Chilis und Zitronenblatt – Công thức món Thái: gà xào sả ớt và lá chanh – 泰式食谱:香茅、辣椒和柠檬叶炒鸡肉 – タイのレシピ: レモングラスと唐辛子とレモンの葉で炒めたチキン
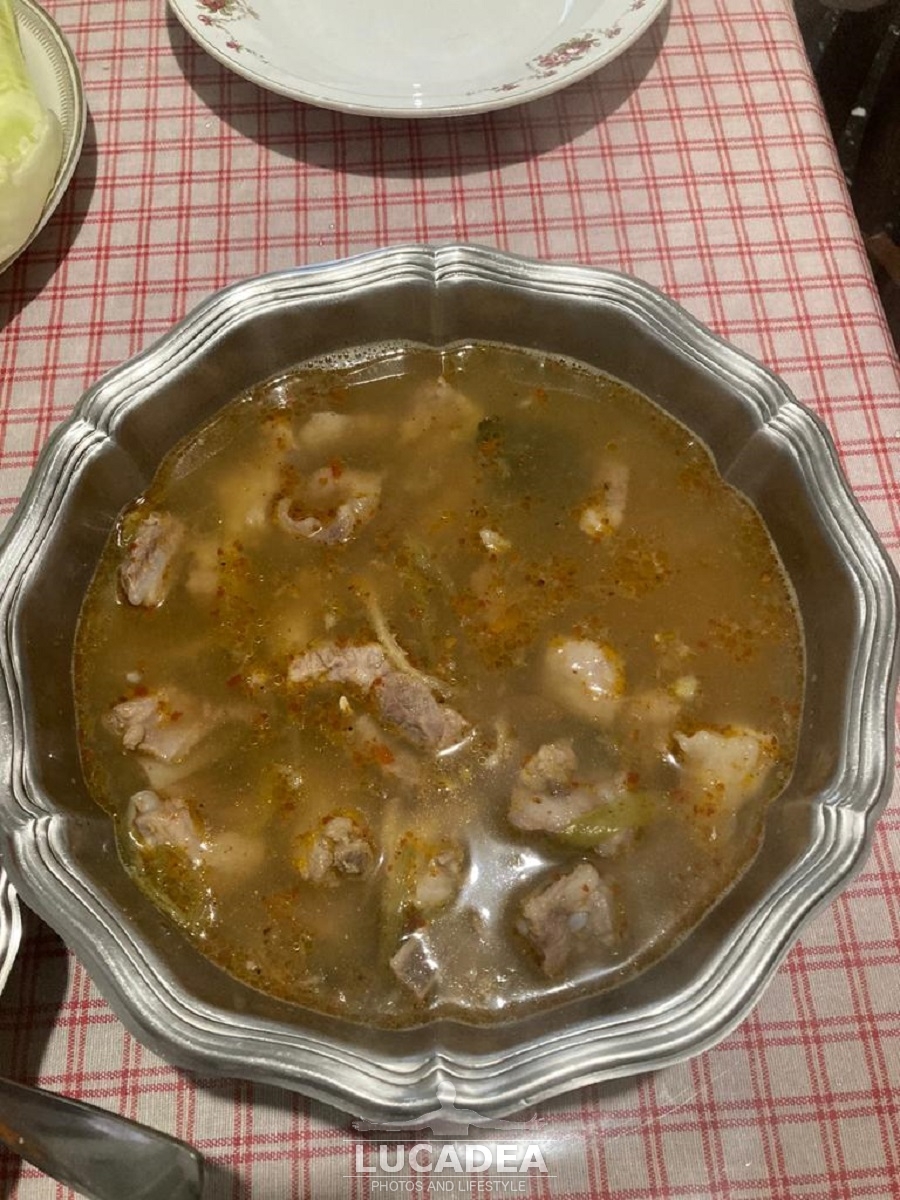
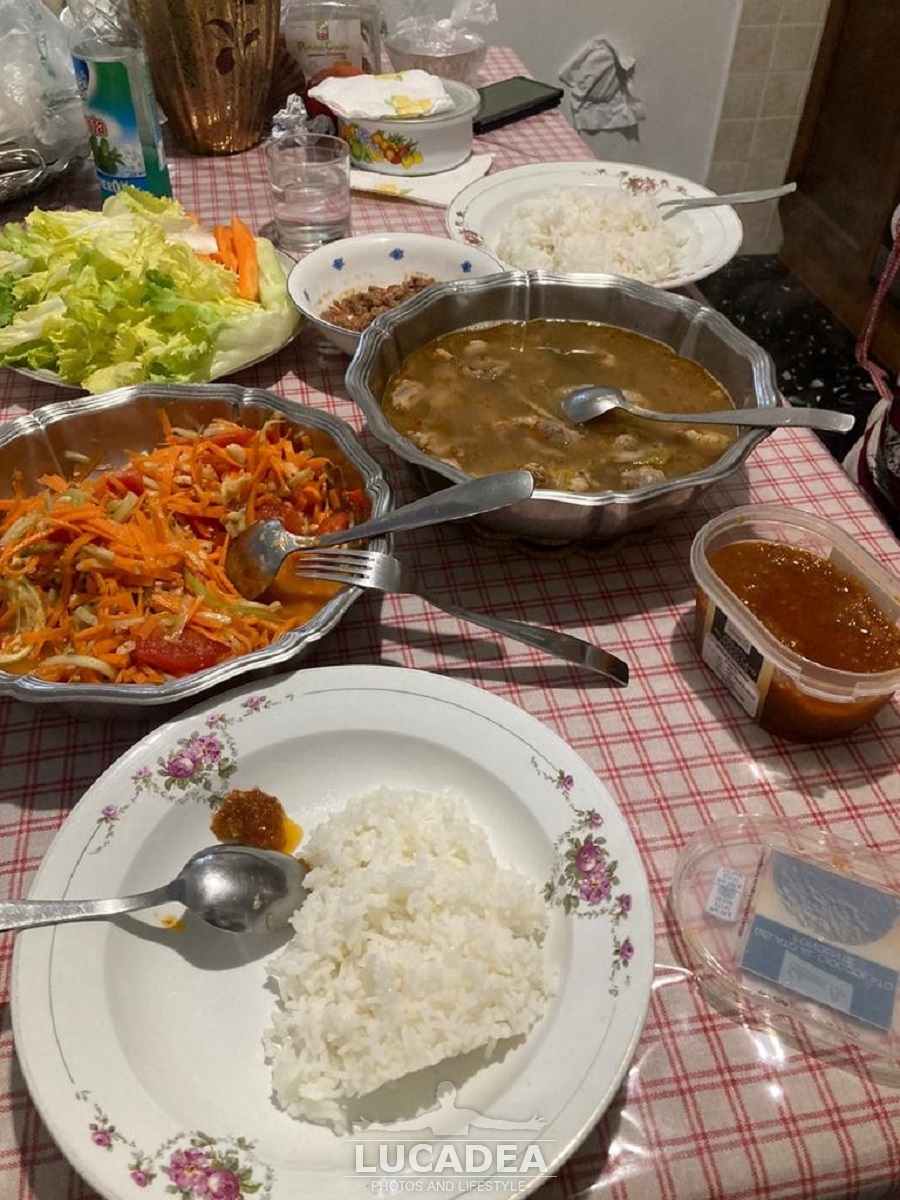
Thai cuisine: pork rib soup, the recipe. A few days ago I also went to eat at my Thai friend Sao's house and, together with her, we prepared an excellent Thai dish. As a side dish there was also a nice salad typical of her country, the som tam, (but I will write a separate article about it when I find the inspiration) some fried anchovies (maybe these more typical of our Riviera) and rice. We had a delicious lunch on a cold winter day.
Click vào đây để đọc bằng tiếng việt! If you are curious about this recipe of mine or Vietnamese food in general, write me a message. comment or go to the bottom of the site to read what other visitors have written.
Ingredients
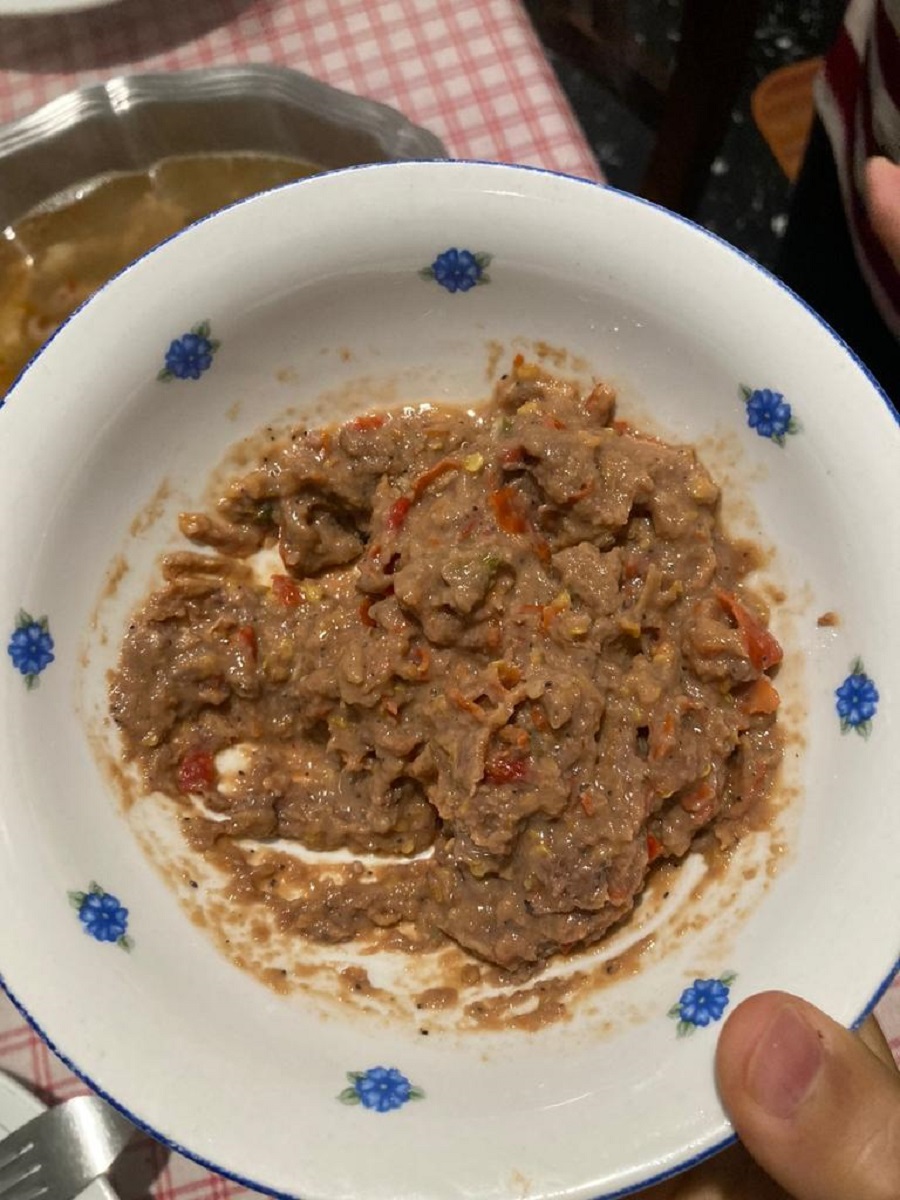
– 250 grams of pork ribs (preferably from a young specimen); – 2 cloves of garlic; – 1 red onion; – 6 fresh chillies; – 2 lemongrass plants cut into pieces; – 3 lemon leaves; – Olive oil – Spices: salt, monosodium glutamate, sugar, prawn paste (pictured), fish sauce, pepper.
As always, some ingredients are a little difficult to find. I sometimes go to Genoa where there are more shops where I can find many interesting things that in my town they just don't know.
Preparation
First, let's start cooking the rice in the appropriate kettle.
Then we prepare the spices: put the garlic, red onion, fresh chili pepper and lemongrass in a blender and chop finely. Then put the mixture in a saucepan and fry with olive oil until fragrant, add about 1.5 liters of water. Add the cleaned ribs and other seasonings: 1 teaspoon salt, 1 teaspoon MSG, 1/2 teaspoon sugar, 1 tablespoon shrimp paste, add lemon leaves. Cook until the mixture comes to a boil, reduce the heat and cook for another 15 minutes until the meat is tender, then add 2 tablespoons fish sauce and pepper to taste.
The preparation of young pork ribs (spicy) is very similar to Thai chicken curry (which I told you about here) but differs in some spices. Most Thai dishes are cooked spicy and fragrant with shrimp paste (pictured) and the aroma of lemon leaves and lemongrass. If you eat it a couple of times you become addicted to Thai food very easily!
Canh sườn non cay
– 250gram sườn heo non – 2 tép tỏi – 1 củ hành tím – 6 quả ớt tươi – 2 cây sả cắt thành nhiều khúc nhỏ – Lá chanh: 3 lá – Gia vị: muối, bột ngọt, đường, mắm tôm, nước mắm, tiêu – (Một số gia vị phải mua tại Genova) Cách nấu: Cho tất cả: tỏi, hành tím, ớt tươi, sả vào máy xay và xay nhỏ. Sau đó cho hỗn hợp vào xoong và xào với dầu ăn cho đến khi vàng thơm, cho lượng nước khoảng 1,5 lít, nấu xôi sau đó cho sườn non đã làm sạch vào và nêm gia vị: 1 muỗng cà phê muối, 1 muỗng cà phê bột ngọt, 1/2 muỗng cà phê đường, 1 muỗng canh mắm tôm, cho lá chanh vào. Nấu đến khi hỗn hợp sôi lên, hạ nhỏ lửa và nấu trong 15 phút hơn cho thịt mềm, sau đó cho thêm 2 muỗng canh nước mắm và nêm nếm lại gia vị vừa khẩu vị gia đình, thêm tiêu và hoàn tất món ăn. Món sườn non nấu cay, cũng tương tự như món cà ri gà của Thái lan, nhưng có một số gia vị không cho vào. Hầu hết các món ăn của Thái được nấu cay và thơm mùi mắm tôm, và mùi thơm của các loại lá và sả, ăn một vài lần là nghiện món ăn của người Thái.
Hôm nay, cô Sau nấu món này, cùng với món cá cơm chiên bột, món rau trộn salad Thái (somtam) và cơm. Chúng tôi đã có một buổi trưa thật ngon miệng trong ngày đông lạnh giá.
Thai recipe: pork rib soup – Recette thaïlandaise : soupe de côtes de porc – Receta tailandesa: sopa de costillas de cerdo – Receita tailandesa: sopa de costela de porco – Thailändisches Rezept: Schweinerippchensuppe – Công thức món Thái: súp sườn heo – 泰式食谱:排骨汤 – タイのレシピ: ポークリブ スープ
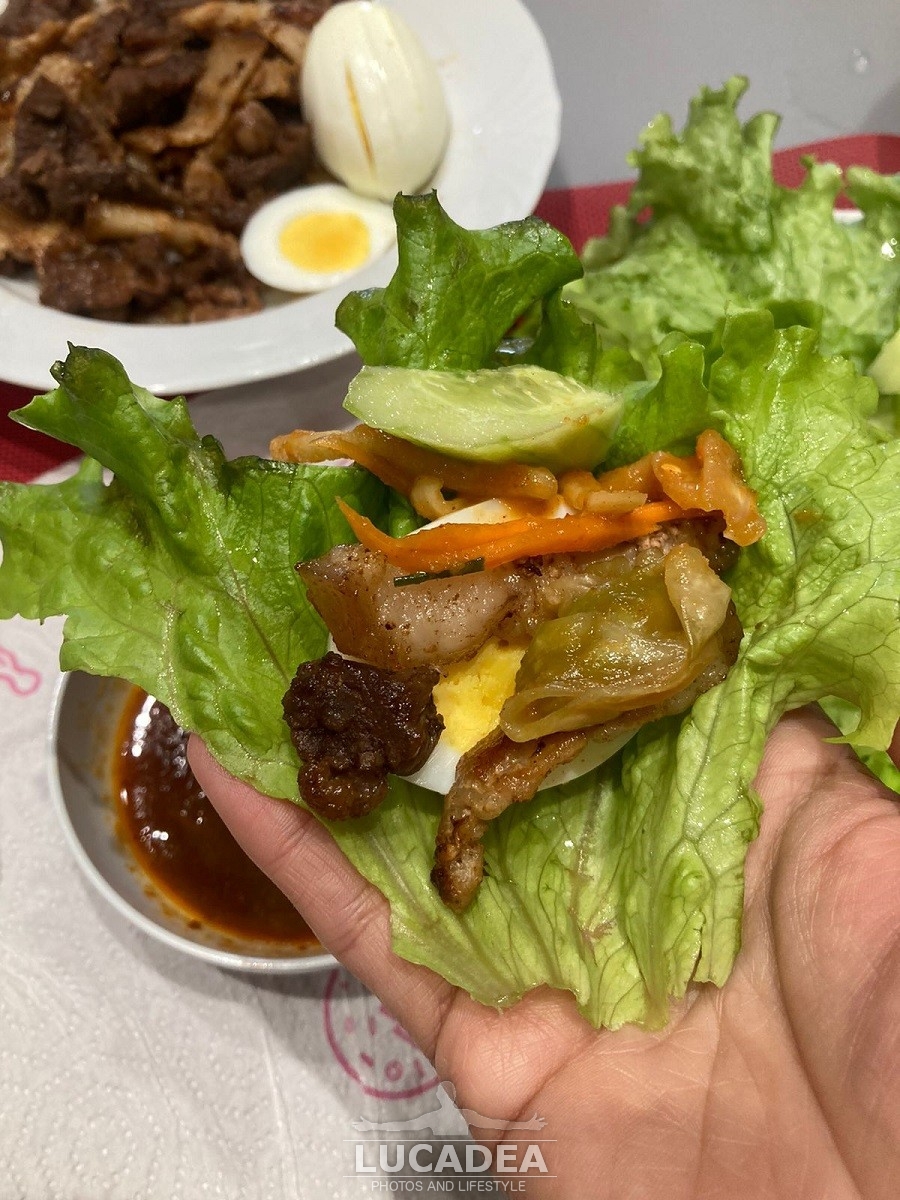
Vietnamese Cuisine: Grilled Meat with Kimchi, the Recipe
Click vào đây để đọc bằng tiếng việt! If you are curious about this recipe of mine or Vietnamese food in general, write me a message. comment or go to the bottom of the site to read what other visitors have written.
Every now and then I cook this dish because it's quick and very good. Now I'll explain how I prepare it.
Ingredients
– Lettuce, washed cucumber, sliced cucumber; – Kimchi (you need to prepare it three days in advance or you can buy it in Asian supermarkets); – 2 hard-boiled eggs, cut into pieces; – Bacon: 130 grams; – Beef tendon: 130 grams; – Finely chopped onions: 3 teaspoons; – Finely chopped garlic: 2 teaspoons; – Chopped chives (lemon): 1 teaspoon; – Fresh chili pepper: finely chopped; – Chili satay: 3 teaspoons; – Korean chili sauce: 2 teaspoons; – Oyster sauce: 1 tablespoon; – Honey: 1 tablespoon; – Spices: cooking oil, sugar, seasoning, monosodium glutamate, pepper.
Preparation
Put some oil in a pan, then add the finely chopped onions, garlic, lemongrass and chili pepper and sauté until fragrant. Then continue adding 5 tablespoons of soy sauce, 2 tablespoons of water, 3 teaspoons of chili satay, 2 teaspoons of Korean chili sauce, 2 tablespoons of sugar, 1 teaspoon of seasoning and half a teaspoon of MSG. Bring this mixture to a boil, then reduce the heat to low and season to taste (this mixture will be used as a sauce to dip the grilled meat and vegetables in, and also used as a marinade if you have any leftovers; it can be stored in the refrigerator and used for 3-5 days)
Now we have to prepare the bacon and the beef: wash them (I use to rinse all the meat before eating it) and slice them as you like. Put the spice mix just prepared on top of the meat to marinate it. And add the oyster sauce and honey. Mix well so that the meat absorbs evenly. Marinate the meat for about 30 minutes to be able to grill it.
Place the meat on the griddle, grill until golden brown on both sides. During cooking, you can add a layer of marinade sauce on the meat, so that the meat does not dry out. After grilling, place on a plate, along with the sauce and kimchi (which I will tell you about in another post in the future).
Now you can enjoy the grilled meat roll with kimchi. Very simple and easy to make.
Thịt nướng ăn cùng kim chi. Chuẩn bị nguyên liệu * Rau xà lách, dưa leo rửa sạch, thái dưa leo * Kim chi (cần làm trước 3 ngày hoặc mua tại siêu thị người Châu Á) * 2 quả trứng luộc và cắt thành từng miếng * Thịt ba chỉ : 130 gram * Thịt bò gân: 130 gram * Hành củ thái nhỏ: 3 muỗng cà phê * Tỏi thái nhỏ: 2 muỗng cà phê * Sả thái nhỏ: 1 muỗng cà phê * Ớt tươi: thái nhỏ 2 quả * Ớt sa tế: 3 muỗng cà phê * Tương ớt hàn quốc: 2 muỗng cà phê * Dầu hào: 1 muỗng canh * Mật ong: 1 muỗng canh * Gia vị: dầu ăn, đường, hạt nêm, bột ngọt, tiêu.
* Thịt ba chỉ và thịt bò rửa sạch, thái lát vừa ăn. * Cho dầu lên chảo, rồi cho hành, tỏi, sả, ớt đã thái nhuyễn ở trên vào, xào cho thơm. Sau đó tiếp tục cho 5 muỗng canh nước tương, 2 muỗng canh nước lọc, 3 muỗng cà phê ớt sa tế, 2 muỗng cà phê tương ớt hàn quốc, 2 muỗng canh đường, 1 muỗng cà phê hạt nêm, nửa muỗng cà phê bột ngọt. Nấu cho hỗn hợp này sôi rồi hạ lửa nhỏ lại, nêm nếm cho vừa khẩu vị. Sau đó tắt bếp. (Hỗn hợp này sẽ dùng làm nước chấm ăn kèm với cuốn thịt nướng và rau, đồng thời dùng để ướp, nếu còn dư có thể bảo quản trong tủ lạnh và dùng trong 3-5 ngày) * Cho phần hỗn hợp gia vị vừa làm ở trên vào phần thịt. Và cho thêm dầu hào và mật ong đã chuẩn bị ở trên. Trộn đều để thịt được thấm đều gia vị. Ướp thịt trong khoảng 30 phút là có thể nướng. * Xếp thịt lên vỉ, nướng vàng đều 2 mặt. Trong lúc nướng có thể quét thêm 1 lớp xốt gia vị ướp lên thịt, để thịt không bị khô. * Sau khi nướng xong, cho ra đĩa, cùng với nước sốt ở trên và kim chi là có thể thưởng thức món thịt nướng cuộn kim chi. Rất đơn giản và dễ làm.
Vietnamese recipe: grilled meat with kimchi – Recette vietnamienne : viande grillée au kimchi – Receta vietnamita: carne a la parrilla con kimchi – Receita vietnamita: carne grelhada com kimchi – Vietnamesisches Rezept: gegrilltes Fleisch mit Kimchi – Món Việt: thịt nướng kim chi – 越南食谱:泡菜烤肉 – ベトナム料理 キムチ焼き肉
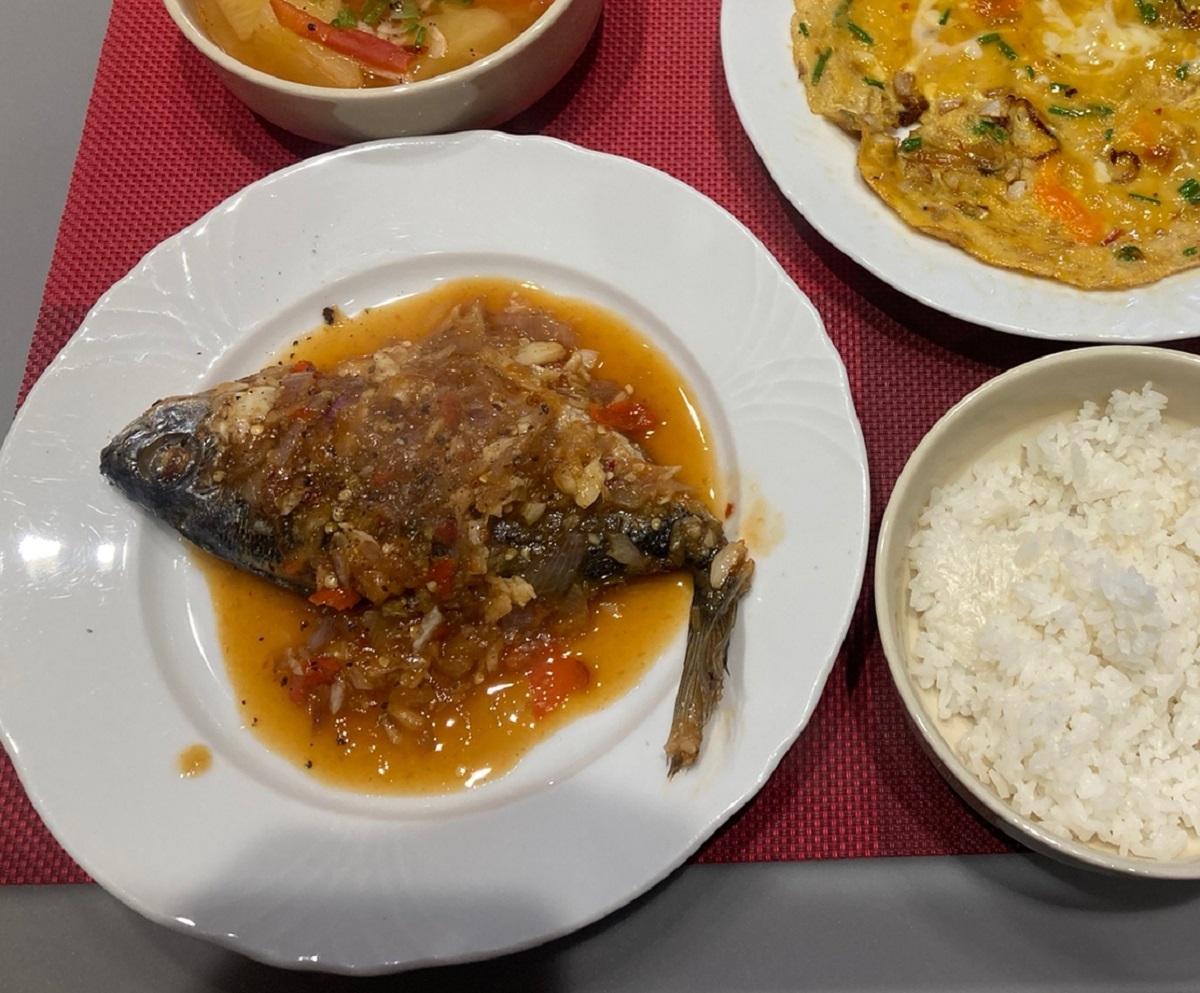
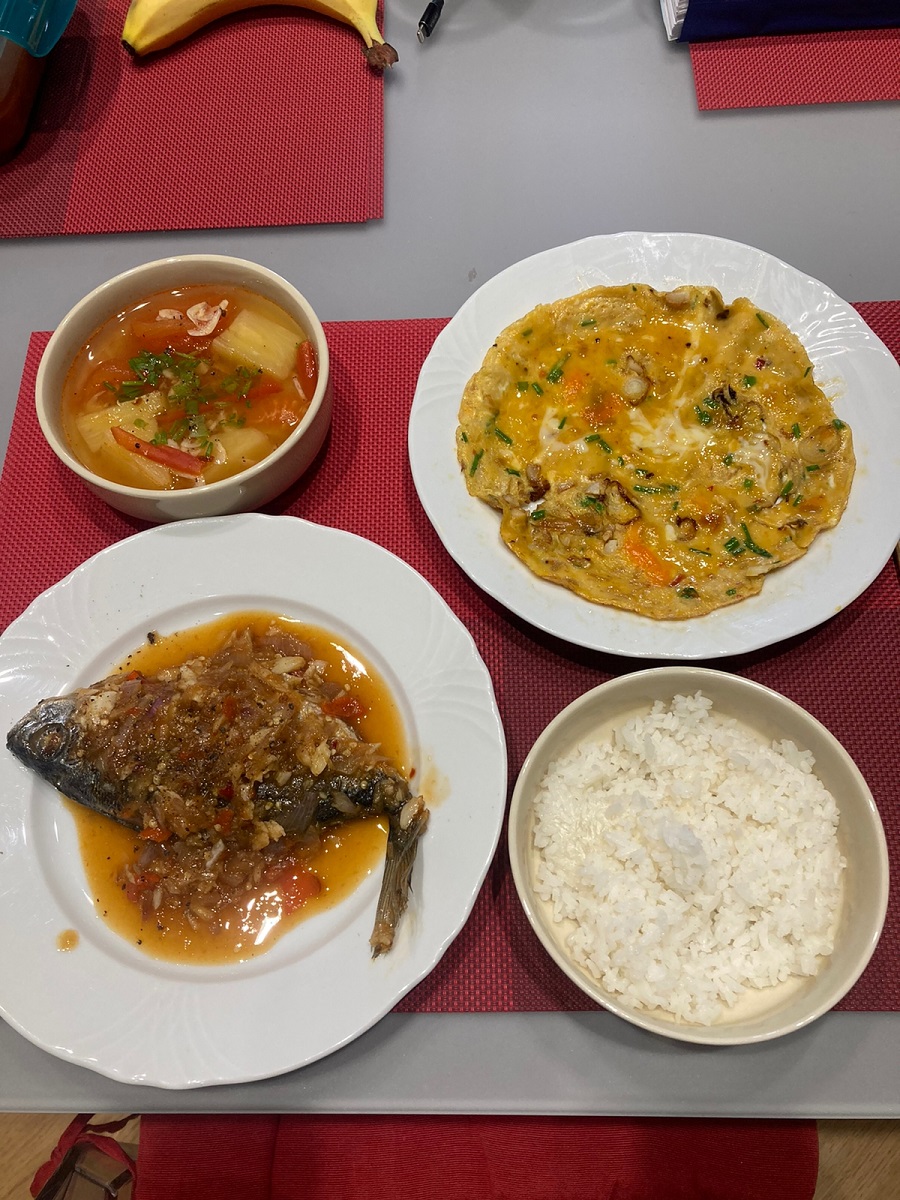
Vietnamese Cuisine: Fried Fish, Crispy, with Sour and Spicy Sauce, the Recipe.
Click vào đây để đọc bằng tiếng việt! If you are curious about this recipe of mine or Vietnamese food in general, write me a message. comment or go to the bottom of the site to read what other visitors have written.
Ingredients
– 1 sea bream (2 if they are small), you can also use red snapper which is also very tasty; – 20 g of soft wheat flour; – 1 onion; – 3 cloves of garlic; – 4 fresh chillies; – Olive oil as needed; – Condiments: fish sauce, soy sauce, monosodium glutamate, sugar, pepper, paprika and satay.
Depending on your taste, you can add less or more onion, garlic and chili pepper.
Preparation
Gut and scale the fish (I use white wine and salt to rub the fish) then rinse and let dry. When the fish is dry enough use the flour to coat it; this will form, during cooking, a thin crispy layer all over the body.
The next step is to heat some oil in a pan; when it is hot enough, put the fish in and fry it on both sides until golden brown. To cook the fish evenly without burning it, reduce the heat to very low, let the fish cook inside too. Separately prepare a spicy and sour sauce: onions, garlic, chili pepper are crushed and finely chopped, then add: 1.5 tablespoons of fish sauce, 1 teaspoon of soy sauce, 2/3 teaspoon of sugar, 1/3 teaspoon of monosodium glutamate powder, 1/3 teaspoon of chili powder and 1 teaspoon of satay; add 1 tablespoon of water and mix well. After the fish is fried until golden brown, sprinkle it evenly with the hot and sour sauce and continue cooking for another 2 minutes or so (you see that the mixture thickens well). You taste it again to see if the seasoning is right for your taste and that's it. Then put it on a plate and decorate it in a way that attracts attention and enjoy. I had it with an omelette, soup and of course white rice. Don't forget to sprinkle some pepper to taste! Good luck.
Cá chiên giòn sốt chua cay Nguyên liệu: Cá tráp: 1 hoặc 2 con (orata di pesce). Bạn có thể dùng cá diêu hồng cũng rất thơm ngon. Bột mỳ: 20g 1 củ hành củ. 3 củ tỏi tươi. 4 trái ớt tươi. (tùy theo khẩu vị mà bạn có thể cho ít hoặc nhiều hành, tỏi và ớt) Gia vị: nước mắm, nước tương, bột ngọt, đường, tiêu, ớt bột và sa tế.
Cách nấu:
Sơ chế sạch sẽ cho cá (dùng rượu trắng và muối chà sạch cá, thì nó sẽ không bị tanh). Rửa lại và để ráo nước.
Cá rau khi đã ráo nước sẽ dùng bột mì xoa một lớp mỏng đều khắp thân cá.
Tiếp theo là đặt chảo dầu lên bếp, chiên vàng 2 mặt cá. Để cá chín vàng đều mà không bị cháy thì bạn hãy vặn thật nhỏ lửa, để cá chín cả vào bên trong.
Làm sốt chua cay: Hành, tỏi, ớt đem đập và thái nhuyễn, sau đó cho thêm vào: 1,5 muỗng canh nước mắm, 1 muỗng cà phê nước tương, 2/3 muỗng cà phê đường, 1/3 muỗng cà phê bột ngọt, 1/3 muỗng cà phê ớt bột và 1 muỗng cà phê sa tế, cho thêm 1 muỗng canh nước lọc, rồi đánh thật đều hỗn hợp. Cá sau khi đã chiên vàng giòn thì bạn sẽ rưới đều sốt cay này lên, đun thêm khoảng 2phút nữa (thấy hỗn hợp sánh đặc lại là được). Bạn nêm nếm xem lại gia vị như vậy đã vừa khẩu vị hay chưa và thế là hoàn thành. Sau đó cho ra đĩa rồi trang trí sao cho thật bắt mắt và thưởng thức. Đừng quên rắc thêm tí tiêu cho thơm nhé! Chúc bạn thành công.
Vietnamese recipe: fried fish, crunchy, with sour and spicy sauce – Recette vietnamienne : poisson frit, croustillant, avec sauce aigre et piquante – Receta vietnamita: pescado frito, crujiente, con salsa agria y picante – Receita vietnamita: peixe frito, crocante, com molho azedo e picante – Vietnamesisches Rezept: gebratener Fisch, knusprig, mit saurer und scharfer Sauce – Công thức Việt Nam: cá chiên giòn, sốt chua cay – 越南食谱:炸鱼,香脆,配酸辣酱 – ベトナムのレシピ:魚のフライ、カリカリ、酸味とスパイシーなソース
Pasta aglio e olio preparata a casa. Da poco tempo questo tipo di pasta, tra le più semplici da preparare, è diventata una delle mie preferite. Anche se la più classica è con l’aggiunta di peperoncino io la preferisco così, non piccante (anche se un pochino “hot” la sopporto), anche perché a casa non ho peperoncini… Devo ammettere poi, e i veri amanti di questa preparazione mi odieranno, che ho aggiunto un poco di formaggio grattugiato alla fine che però ho evitato di mettere nella foto. Altri ingredienti che normalmente si mettono sono prezzemolo e acciuga che però io non amo né, in questo momento, ho in casa! A voi piace? Piccante oppure no? Con formaggio grattugiato oppure no? Scrivetemelo lei commenti cliccando here!
Gli spaghetti aglio e olio (spaghetti aglio e uoglie) sono un piatto tipico della cucina napoletana, facente parte della schiera di ricette cosiddette della cucina piccina partenopea. Continue and learn more on Wikipedia.